Learn how to prepare and cook this fantastic melt-in-your-mouth bottom round roast recipe from start to finish. This affordable cut has a lot of potential as a family-friendly beef cut and delivers outstanding leftovers, provided you even have leftovers.
And the good news is, it's really a simple main dish, it's foolproof if you follow the instructions, and there is no better way to prepare and cook a bottom round roast.
🌟 Why This Recipe Works
I love this bottom round roast recipe for a few key reasons:
- no additional resting, carve and serve
- meatier, beefier, and more succulent meat
- more consistent and easier to plan
- produces fantastic leftover roast beef
My secret for lean round roasts is cooking low and slow in the oven, making the roast tender and juicy. This method is well known in BBQ, where meat is cooked for 24-72 hours at low temps, resulting in drool-worthy beef.
As a home cook, you're likely familiar with meat like chuck roast, rump roast, and pot roast. Learn more about the best cuts for roast beef and which roast works best depending on the occasion.
Round roasts like bottom round, inside round, or outside round are often found for about $6 per pound. Saving money on beef makes sense for family dinners in today's market, and the leftovers are fantastic.
Today, you'll learn to cook this amazing bottom round roast in the oven on low heat between 150 - 170°F (65 - 76°C) for approximately 3 - 6 hours.
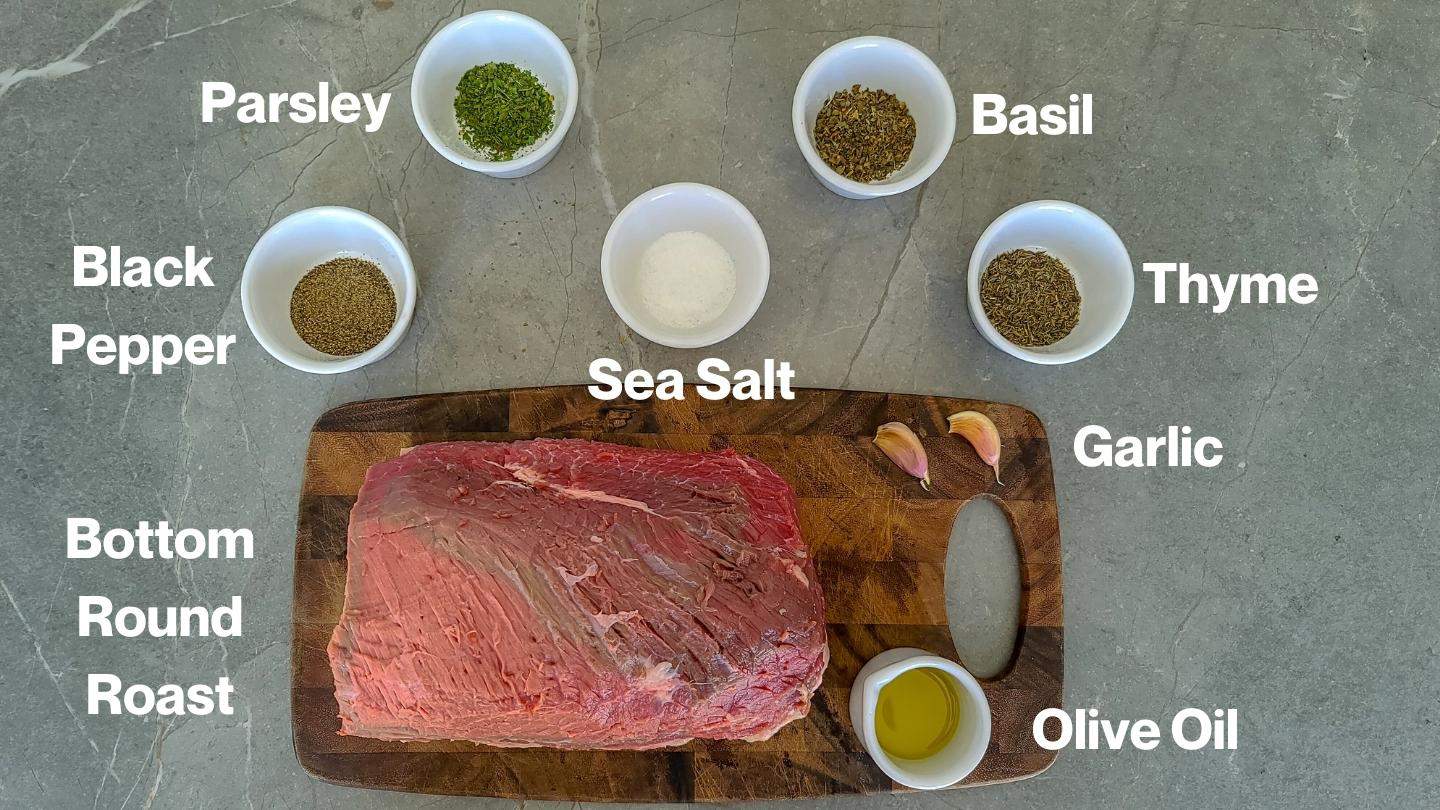
🍽 Ingredients You'll Need
Ingredients for this bottom round roast recipe are easy to find and outlined in the image below. Whenever possible, opt for a USDA prime roast for the best result. Ingredient quantities are available in the recipe card below.
Depending on the butcher, bottom round roasts are labeled differently and may include:
- beef bottom round roast
- bottom round oven roast
- bottom round pot roast
- round rump roast
- beef round roast
Any round roasts above will work; just grab the best roast.
Ingredient Notes
Bottom round roast's come in various qualities and sizes. I'm using a 4-pound bottom round roast in the ingredients list above that cost $20. This is enough to feed a family of 4 with leftovers or family events with up to 8 people.
Not sure which roast to buy? Check out the best beef cuts for roast beef and buy a cut that works for you. Premium roasts for holidays and special occasions, mid-range roasts for the weekend, and inexpensive roasts for everyday meals.
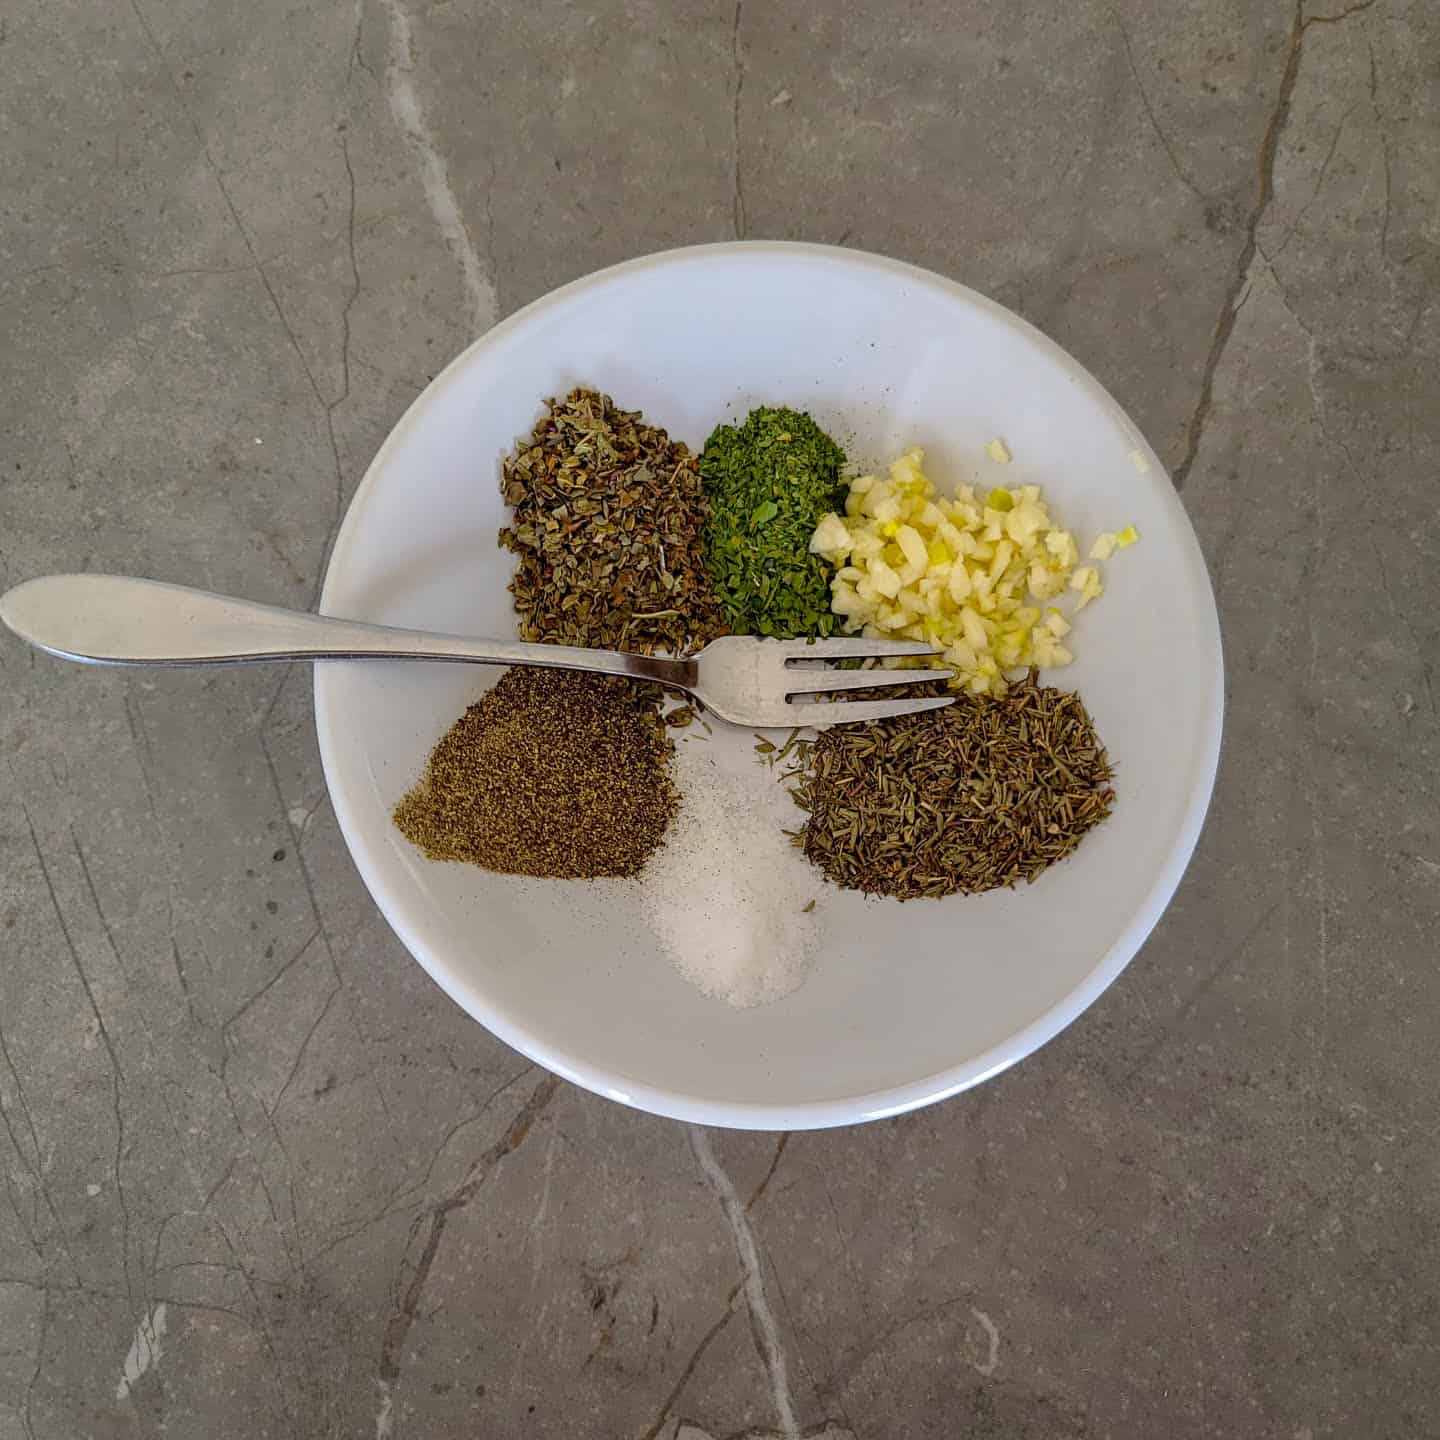
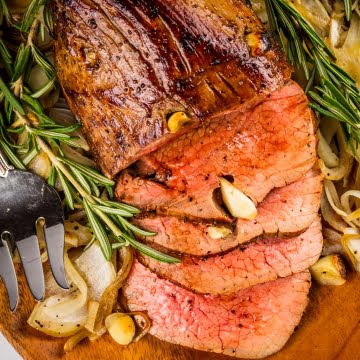
Seasoning is important to enhance the flavor of the roast. I really love thyme, basil, and parsley in this recipe, and tie it all together with olive oil and fresh garlic.
Small Roast Under 3 pounds
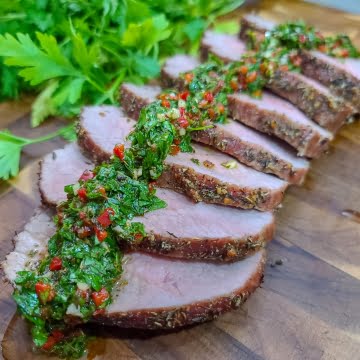
Preheat the oven to 150 degrees Fahrenheit (65 degrees Celsius). Try my 2-pound eye of round roast recipe with chimichurri for smaller roasts.
Large Roast Over 3 Pounds
Preheat the oven to 170 degrees Fahrenheit (76 degrees Celsius). I use the center oven rack for smaller roasts and one position down for larger roasts.
Note: Some ovens may not go this low. Use the lowest available setting and monitor the internal temp with your meat probe.
🔪 How to Make This Recipe
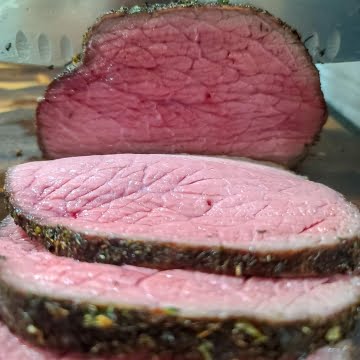
Learn how to prepare and cook a bottom round roast recipe from start to finish. I always aim for medium-rare and find it's the best way to preserve the beef's tenderness and flavor. Of course, if you prefer medium, medium-well, or well done, check my temperature guide below.
Preparation
Preparing this is easy, but the steps are important. Prep time for this dish is about 15 minutes.
From store to Fridge
If you bought a roast on sale and want to eat it within three to five days, store it in the fridge.
If your roast is frozen, let it sit in the fridge overnight and thaw naturally before cooking. Do not defrost a roast in your microwave!
If you have an extra day, season the meat as mentioned below and refrigerate uncovered for another 24 hours. This will give the salt and seasoning time to brine the roast. And it's also going to give the meat's surface more time to dry out, which leads to better browning.
Cooking from the Fridge
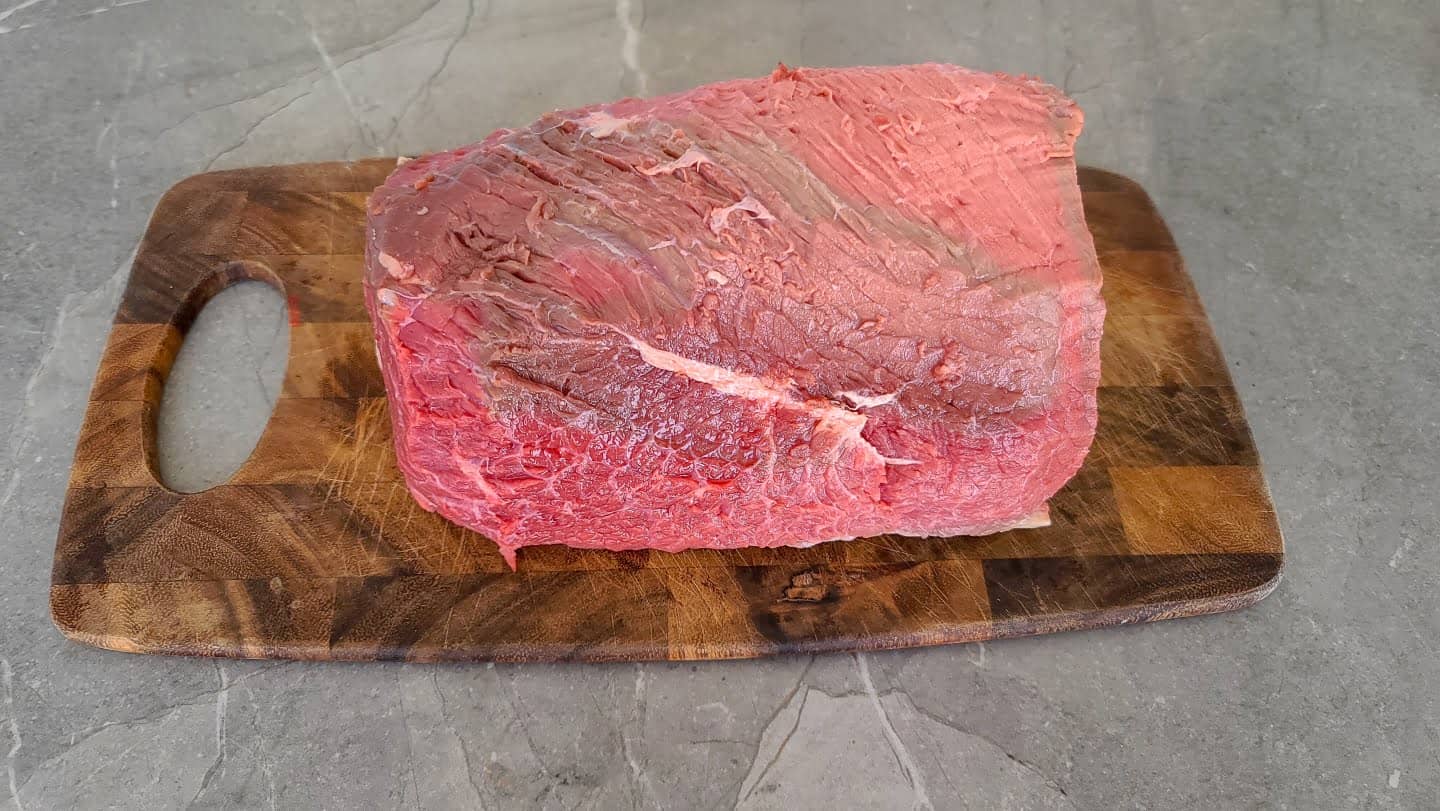
Remove the thawed roast from the fridge and place it next to your sink. Cut the packaging enough to allow the excess liquid to drain.
Transfer the meat to a large cutting board and let it sit for 10 minutes to remove the chill. You can let it sit for up to 30 minutes at room temperature for larger roasts.
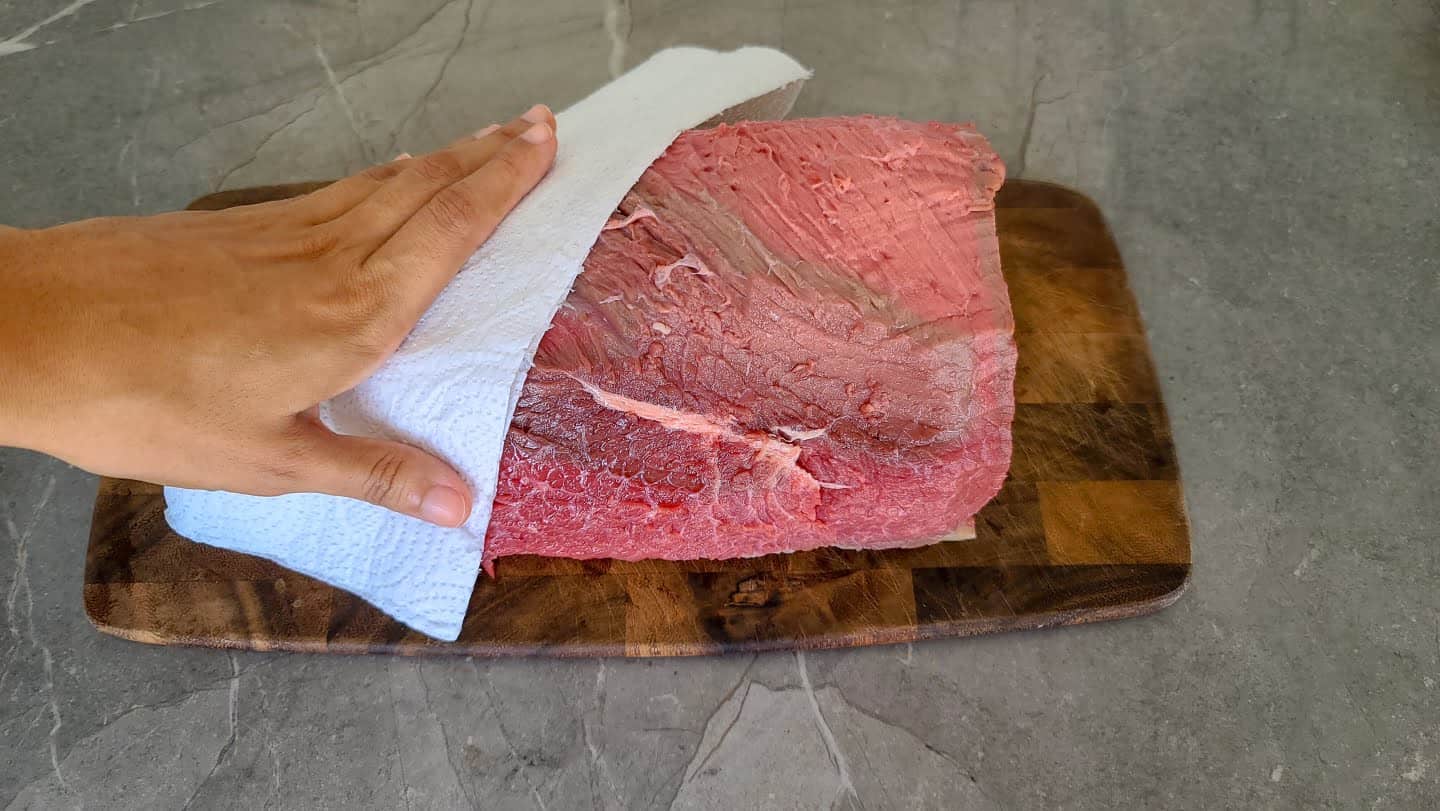
Pat the meat's surface with a paper towel to absorb residual moisture. This helps the seasoning stick and improves the browning process.
Seasoning the Roast
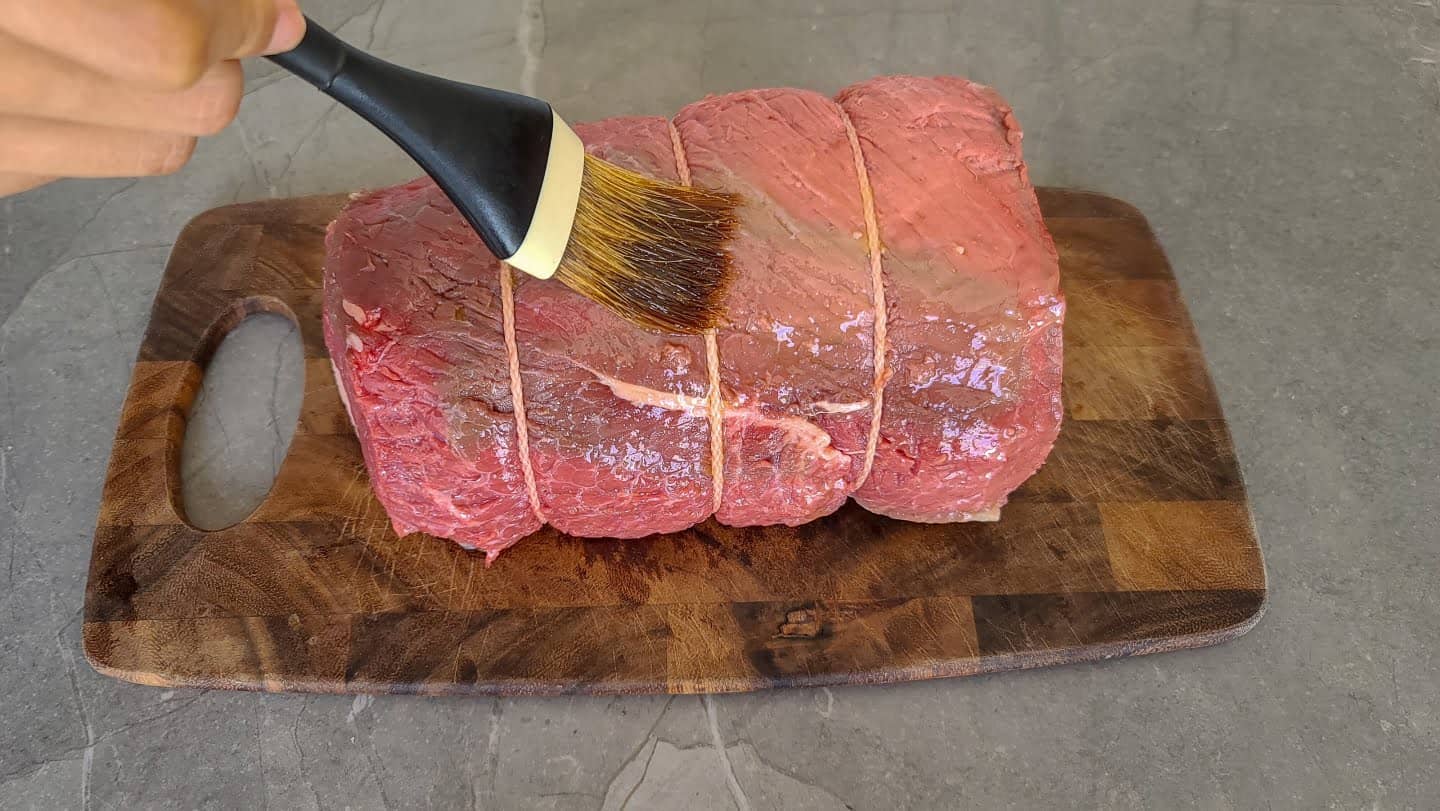
Ensure your meat is dry, and brush the entire surface of the meat with olive oil. If you do not have olive oil, you can use your oil of choice.
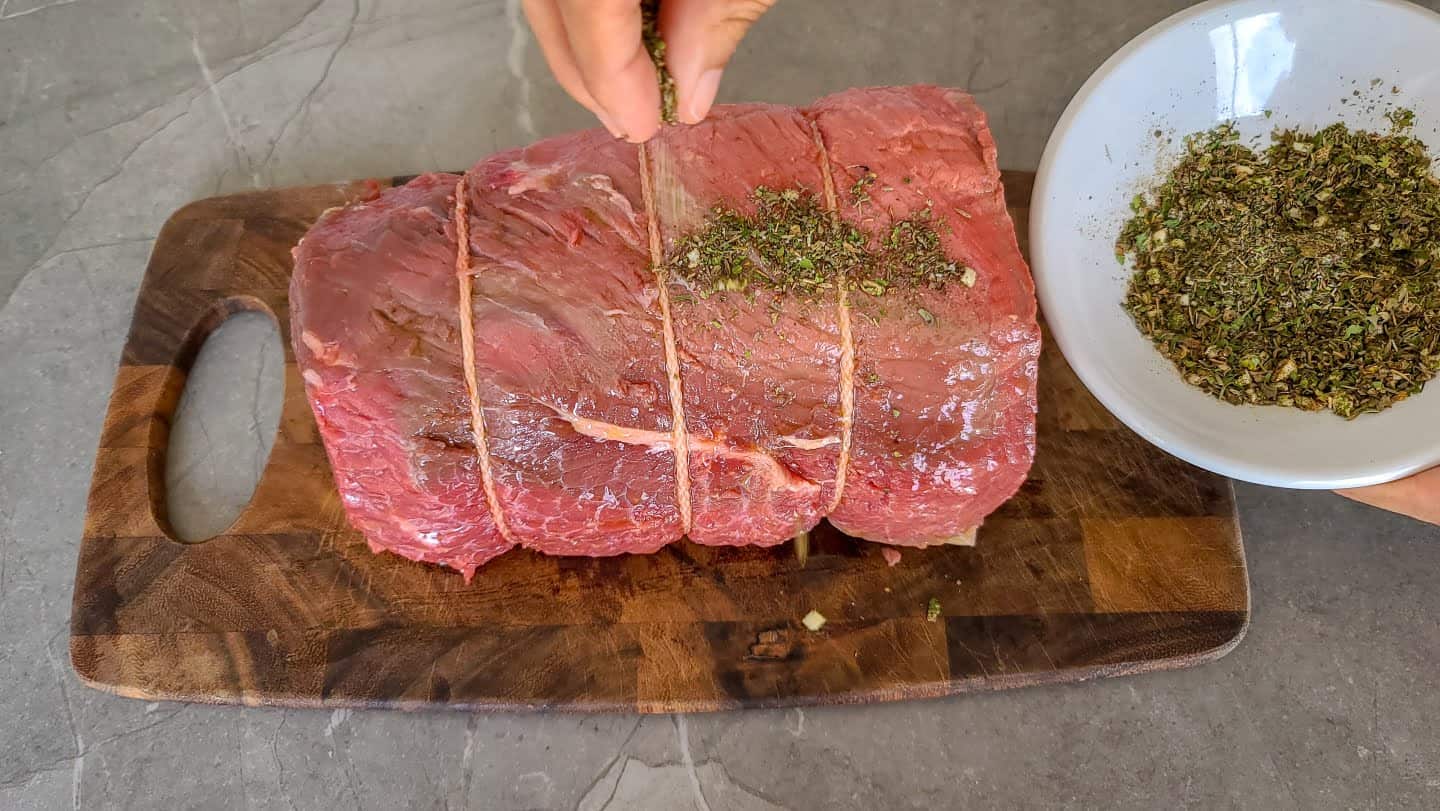
Combine all seasonings in a small bowl and distribute evenly on the roast.
Use your hands to ensure the seasoning really sticks to the red meat. You can even roll it to ensure the seasoning gets embedded into the roast. And feel free to substitute; sometimes, I'll use dried rosemary instead of thyme or both.
Another great option is overnight brine, marinade, or dry rub. Still, I'll cover both of these in more detail another day.
Let's move on to the cooking process now. We'll focus on cooking low and slow, but keep in mind that it may be prepared in various ways.
If you're in a rush or just hungry, you can cook roast beef in the oven for about an hour on high heat.
Just note for lean cuts of beef, low and slow is the best cooking method by far.
Cooking a Bottom Round Roast
The secret about cooking at low heat for a long period of time is that anyone can cook it. You do not need to be a professional chef to cook a flavorful, juicy, and perfectly cooked bottom round roast every time.
If you have a wireless or wired meat probe, insert it into the thickest part of the meat. If you do not have one, add it to your shopping list. Even the most experienced chefs and cooks use a meat thermometer to monitor and check for doneness.
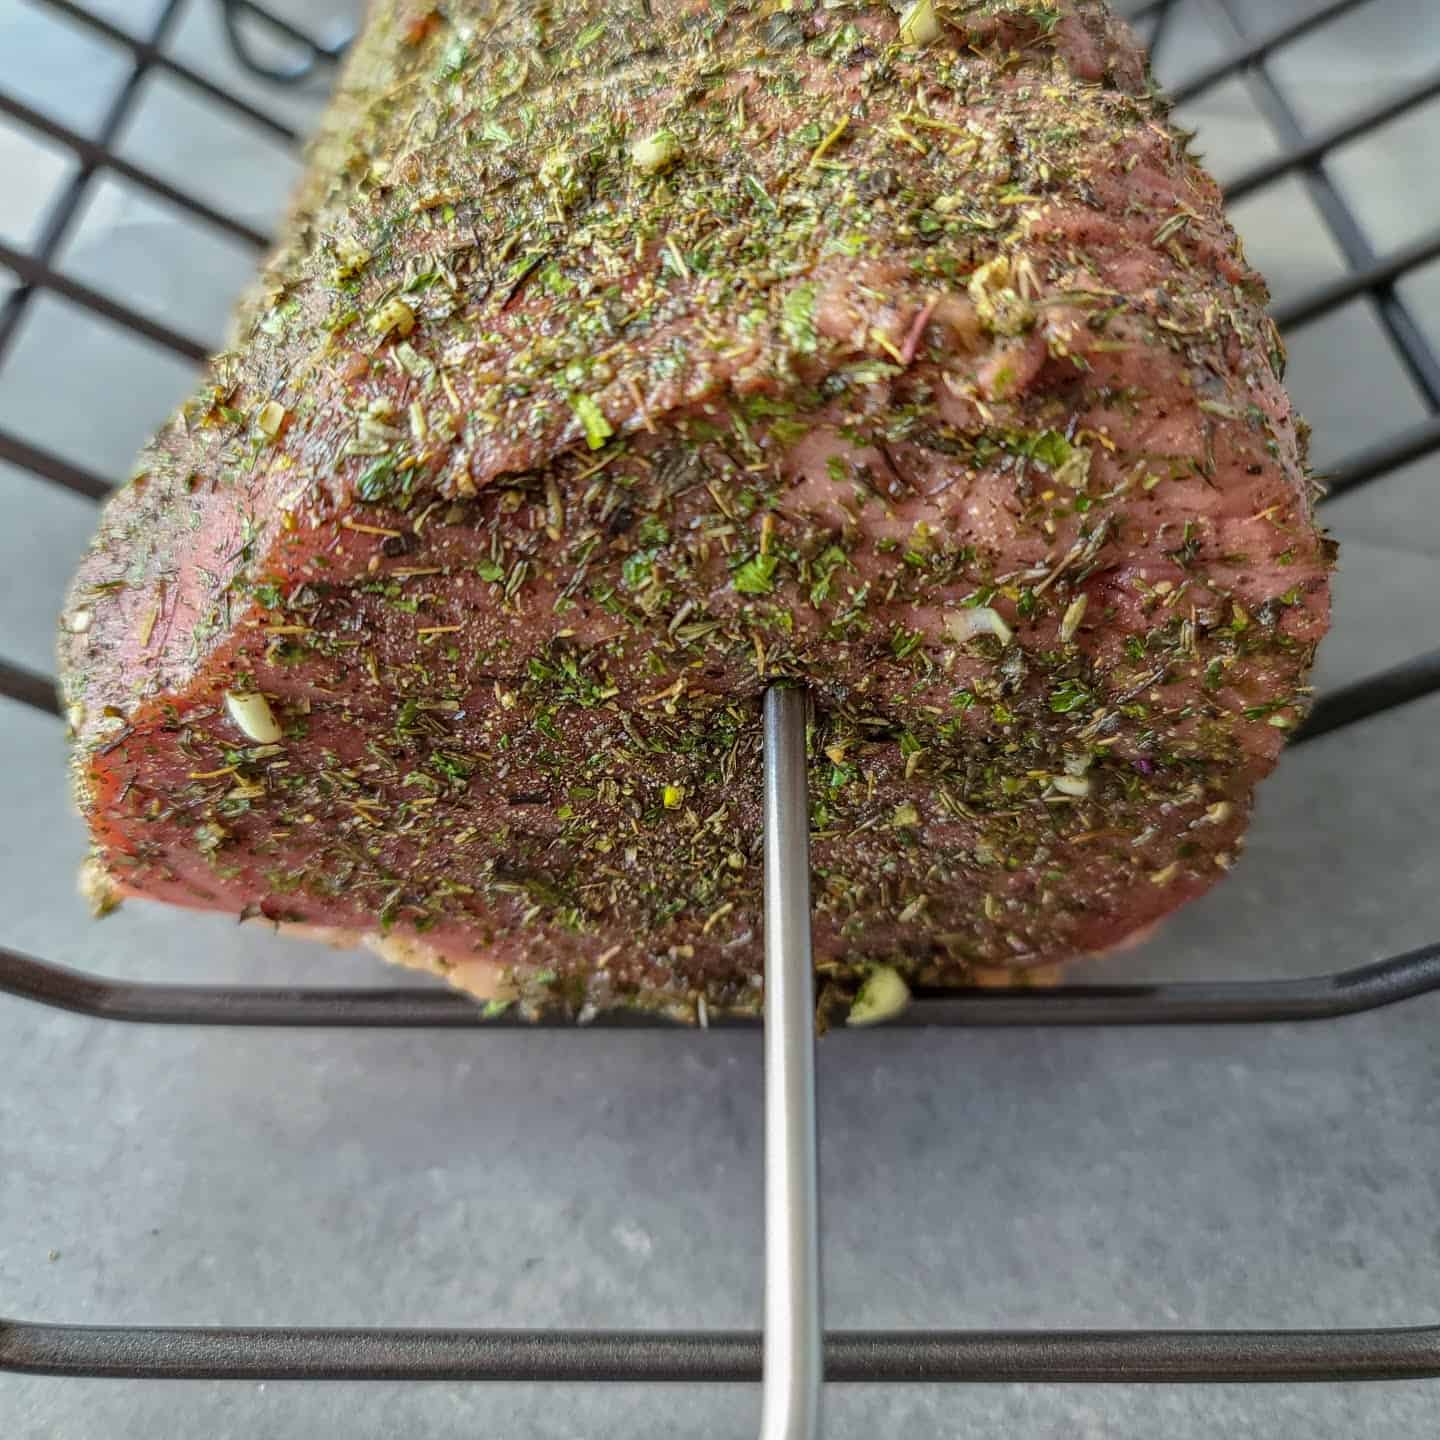
Position the roast in the center of your roasting pan. I prefer a vrack vs. flat rack as it holds the roast in place and find air circulates the roast better.
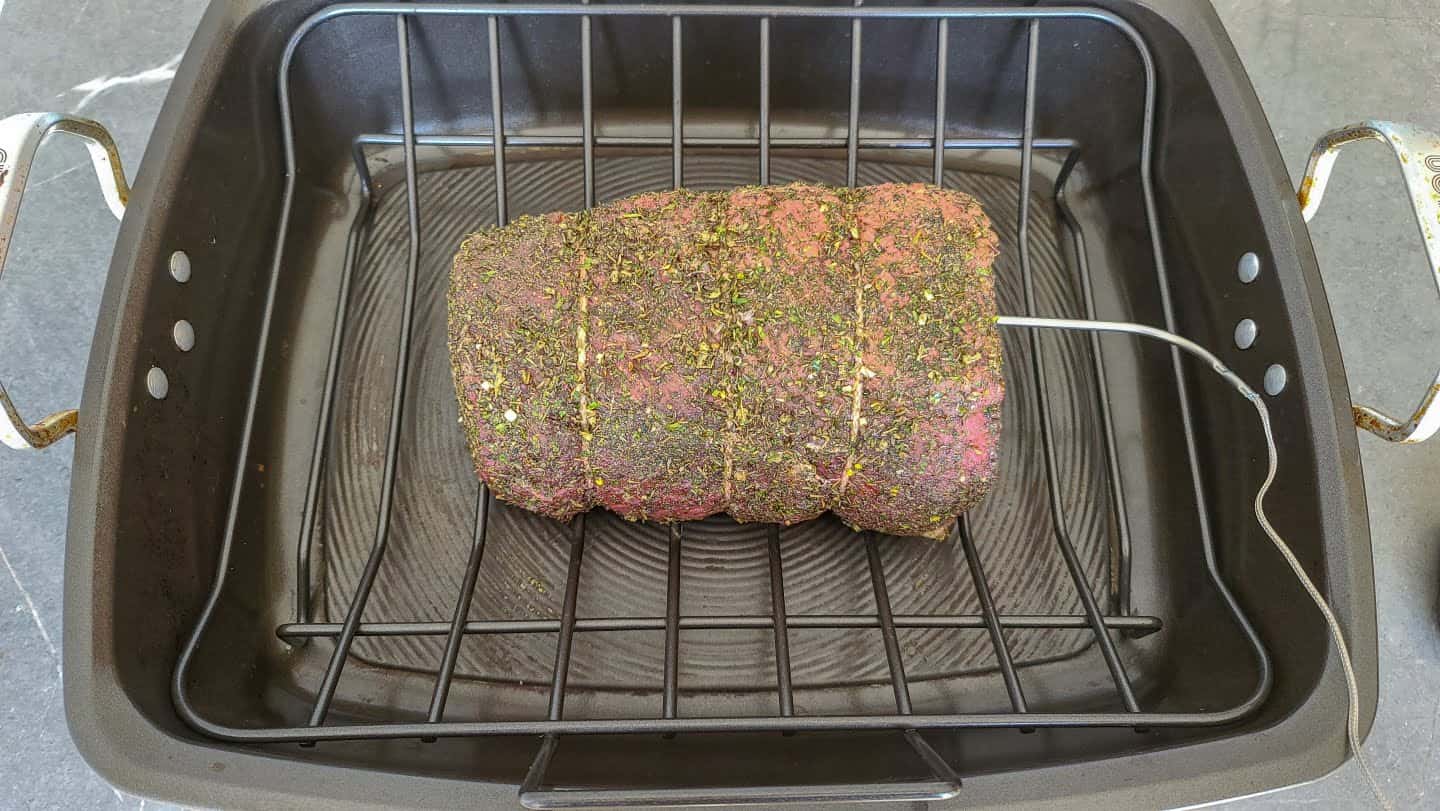
If your roast has the fat cap, place the fattier side on top.
Place the roast in the oven, and when it reaches an internal temperature of 125°F (52°C), it is medium-rare. This is known as the pull temperature!
Bottom Round Roast Cooking Time Chart
The two most popular ways to cook a bottom round roast in the oven are low and slow and high-heat. Here are the key differences:
| Bottom Round Roast | 4 pounds | 4 pounds |
| Cooking Method | Oven | Oven |
| Cooking Temperature | 170ºF | 325ºF |
| Cooking Time Minutes / Lbs. | 120 | 18-22 |
| Pull Temperature | 125ºF | 125ºF |
| Resting Time Minutes | 10-120 | 10-120 |
| Final Temperature | 135ºF | 135ºF |
| Tips | Reverse Sear | Reverse Sear |
| Tenderness | 6/10 | 2/10 |
If you have time to spare, low and slow is the best way to cook lean cuts of meat in the oven.
Let your roast rest
After that initial cook, you can let the beef rest at room temperature covered in foil for anywhere from 10 minutes up to 2 hours.
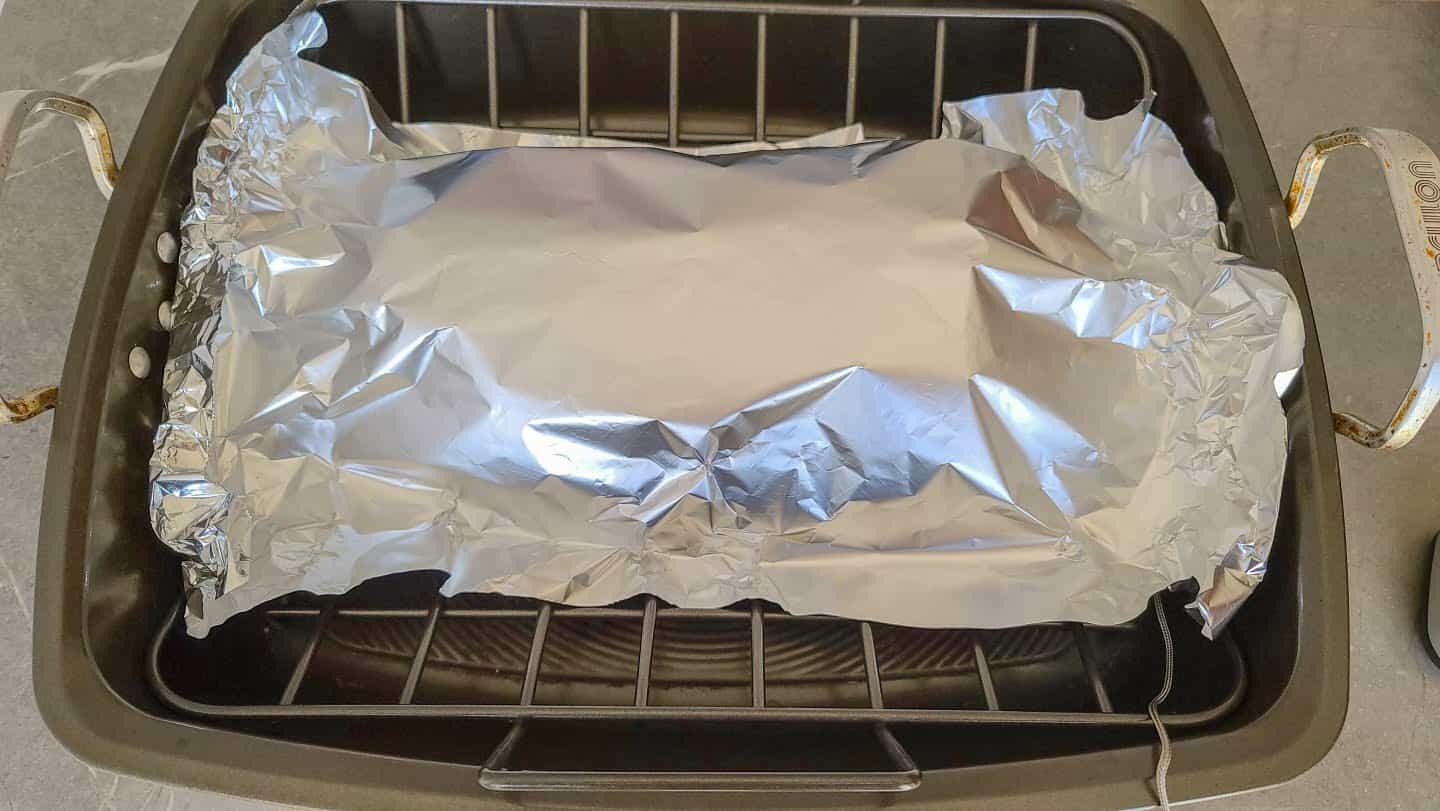
I typically use a foil tent and let it rest until I'm ready to reverse sear, carve, and serve. As soon as everything else is ready, I round up the family and settle in for dinner.
Reverse Sear
As soon as you're ready to eat, you'll want to reverse sear your roast. Preheat oven as high as possible, typically in a high heat range of 500-550°F (260-288°C).
The good news is that because of the long slow cook, the exterior of the roast will be pretty dry and is probably coated in a thin layer of rendered beef fat. Which is perfect for searing!
These are ideal conditions for fantastic browning. Once the oven is preheated, remove the foil, pop the roast in the oven, and let it cook for 10 minutes or until it's nice and crisp and browned on the outside.
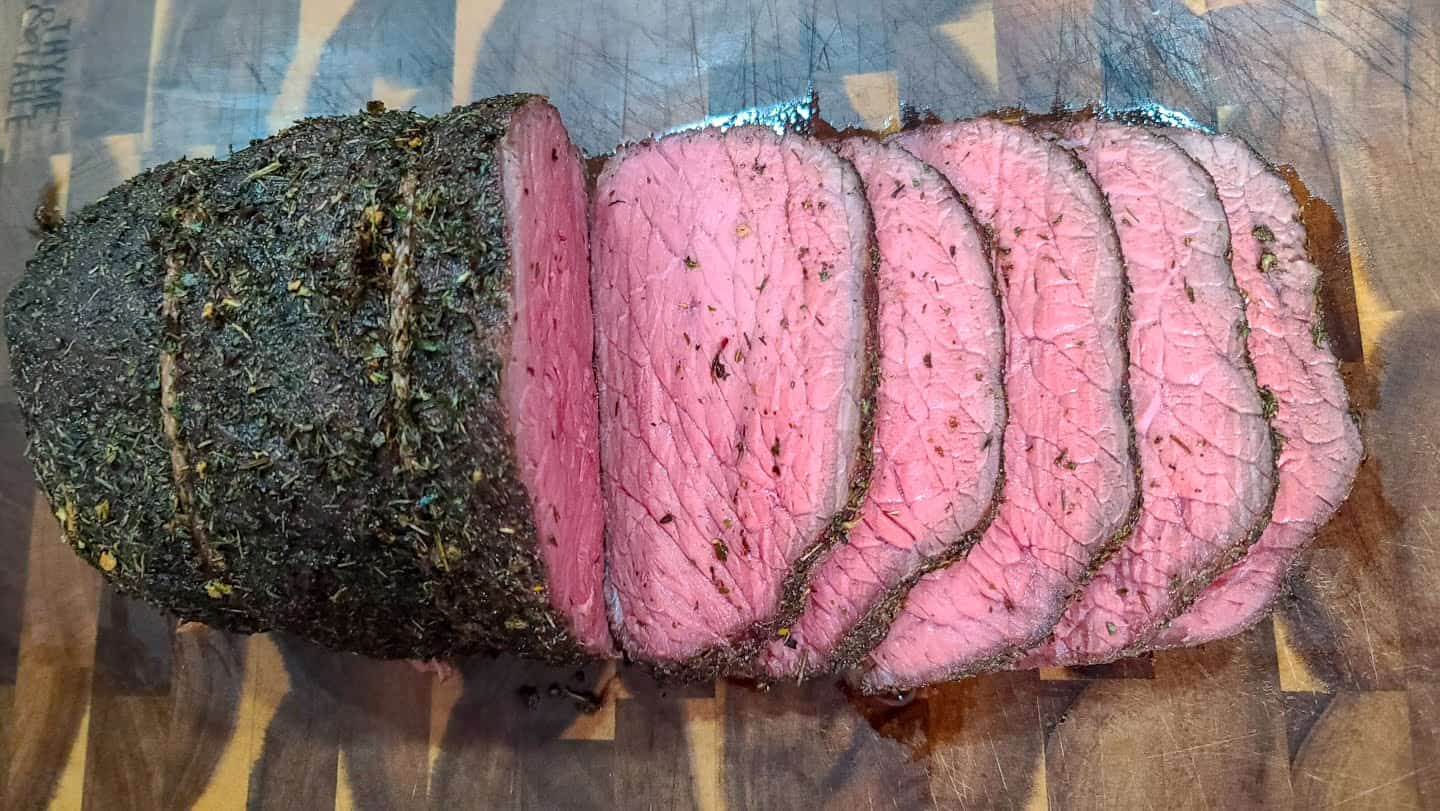
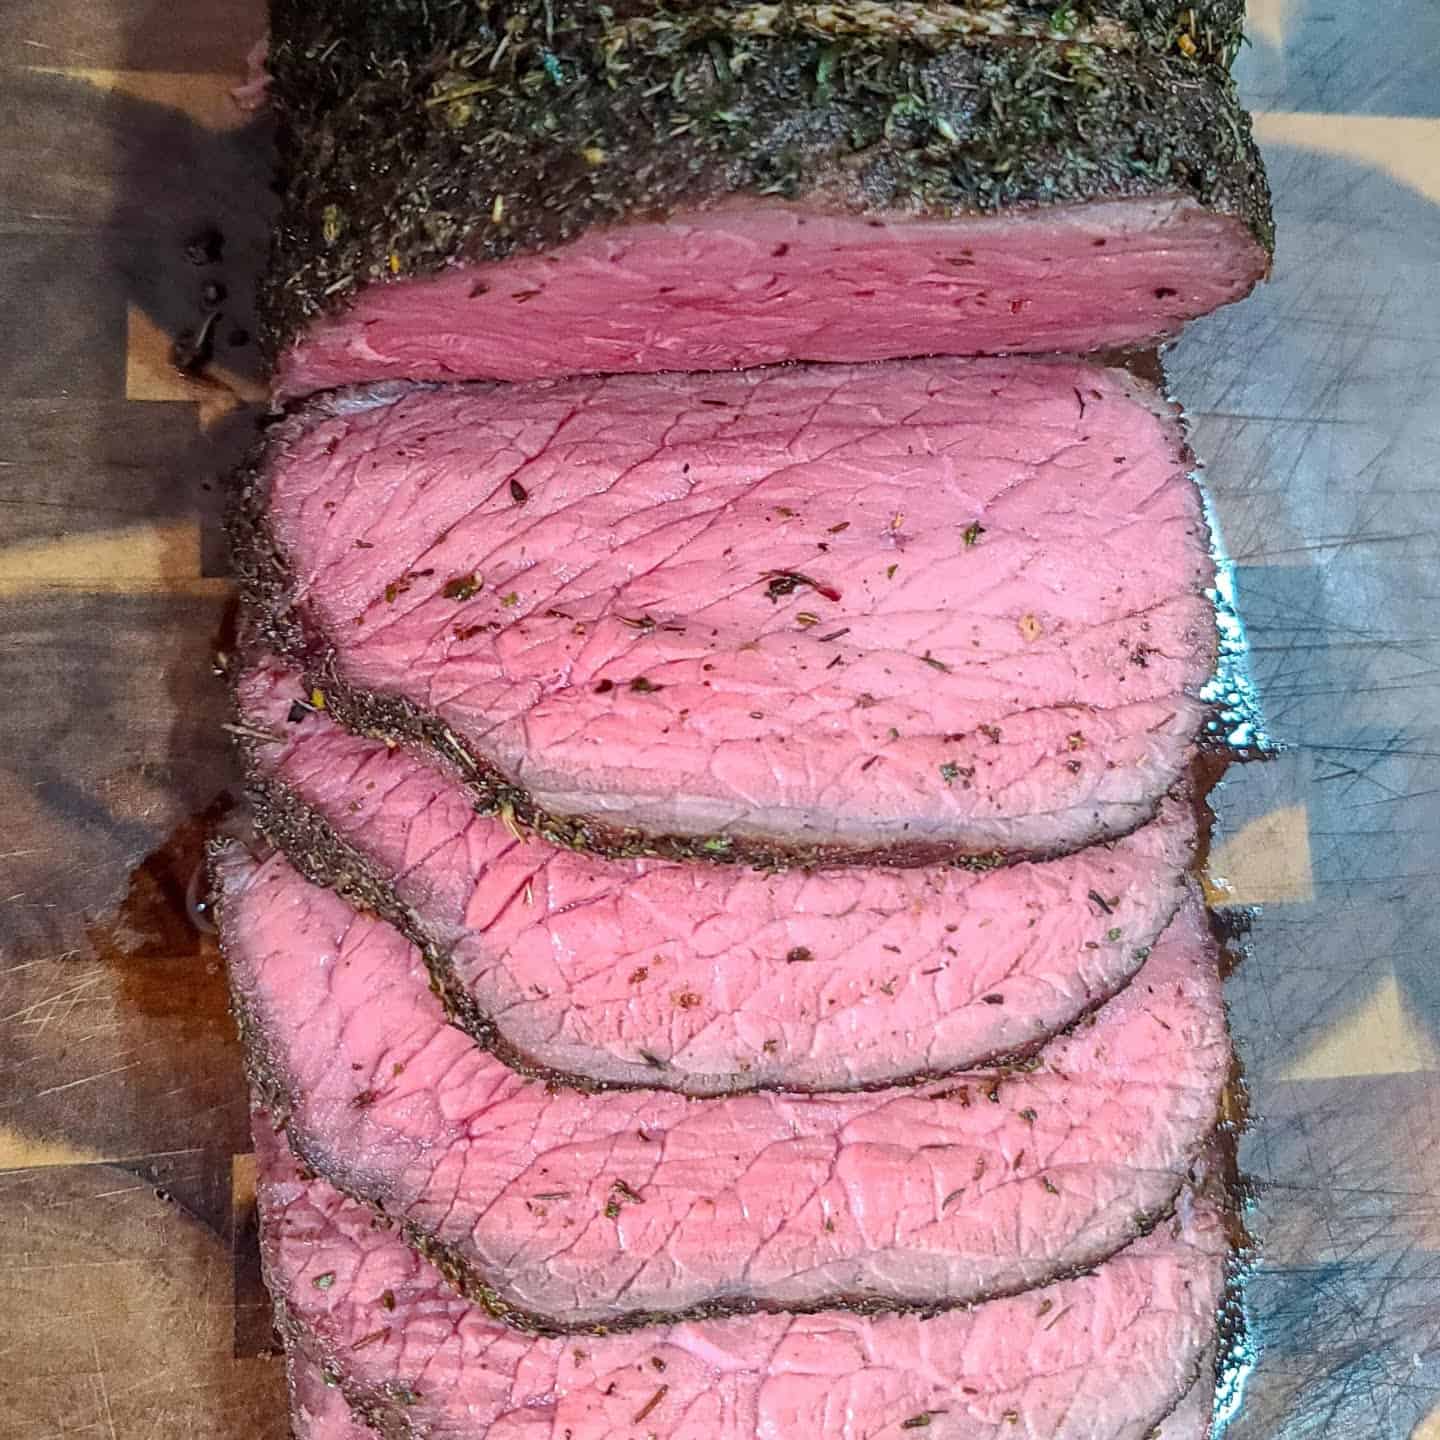
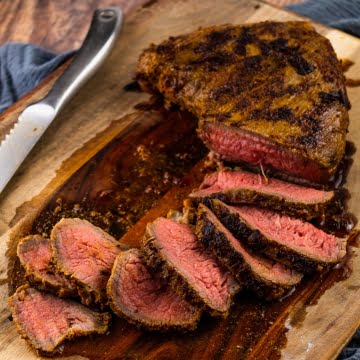
Reverse seared bottom round roast perfectly cooked to medium-rare that is flavorful, delicious, and easy to make.
Carve and Serve
Remove from the oven and transfer roast onto the carving board. No additional resting is required because we already let the roast rest before the reverse sear. Fantastic right?
Sharpen your knife, and carve the roast against the grain. If you're unsure, look for the lines running in the same direction and cut against the lines, commonly known as against the grain.

I like to go about ½-inch thick per slice for dinner and slice any leftover roast beef as thinly as possible.
But of course, if you want a wonderful sauce, a red wine au jus or horseradish cream sauce would be amazing.
Cooking Tips
For the perfect bottom round roast, cook with the fat side up. As the meat cooks, the fat melts and runs down the sides of the meat. This helps provide moisture and flavor, essential for a lean cut of meat.
When cooking roasts, we want that gloriously browned exterior, the crust, but still moist and juicy inside. The rule of thumb for most roasts is to cook uncovered in a shallow pan. If your roast is on the smaller side, under 3 pounds, reduce the temperature to 150°F (66°C).
Optional
Grass-fed USDA prime roast, only slightly more expensive, has improved fat marbling and deeper beef flavor. Potentially an excellent option for Sunday dinner or even a nice holiday dinner. If you are not sure which roast to buy, check out the best cuts for roast beef for a complete list.
Fresh herbs are superior to dried herbs and smell fantastic. If you decide to use fresh, triple the measurements above. I love using herbs like rosemary, thyme, basil, oregano, and garlic cloves to tie everything together. And the aromatics of fresh herbs are fantastic.
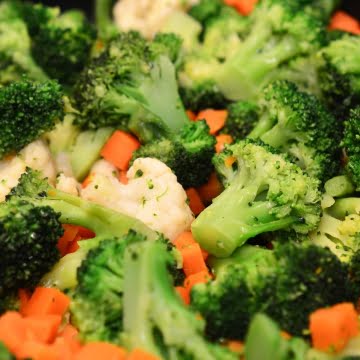
🥗 What to Serve With
For a fantastic main dish like this, I think creamy mashed potatoes, steamed vegetables, and a young, full-bodied red wine would be outstanding.
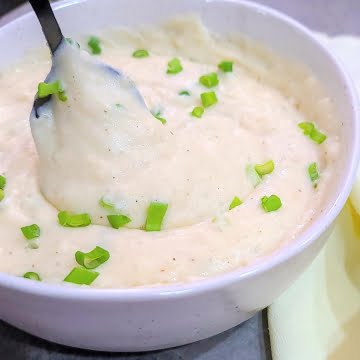

Horseradish Sauce
Since you've already made a juicy roast, why not take a few extra minutes to make a creamy horseradish sauce.
- ½ cup of sour cream
- ⅛ cup of horseradish
- ½ tablespoon Dijon mustard
- salt and pepper to taste
Combine thoroughly and serve!
Beef Gravy
For a simple yet fantastic beef gravy, deglaze the pan with beef broth or beef stock and red wine. In a small bowl, combine flour and butter to form a paste and add it to the pan. Whisk until combined, then bring to a boil to thicken the gravy. Add salt, taste, and adjust as needed.
🌡️ Internal Temperature Guide
About halfway through, you should monitor your roast closely. When cooking low and slow at 170°F (77°C), plan for 2 hours per pound. At high altitudes (5,000 ft or higher), plan for 2.5 hours per pound.
Oven temperature can vary. You'll have a perfect roast every time as long as you roast at a low temperature and monitor with a meat thermometer.
The biggest mistake people make with roasts is not factoring that beef continues to cook while it rests. Commonly referred to as carry over cooking.
Pull Temperatures
When you take the roast out of the oven!
- 120-125 °F (49-52° C) - Rare
- 125-130 °F (52-54° C) - Medium Rare
- 130-135 °F (54-57° C) - Medium
- 135-140 °F (57-60° C) - Medium Well
- 140 °F+ (60° C+) - Well Done
Remove when you reach your desired internal temperature and doneness.
Target Temperature
Add 10 °F to your final temperature to account for resting and reverse sear. For more detail, read the internal temp of beef: degree of doneness for images and temps explained.
Buy a meat thermometer! Preferably a wireless or cabled meat thermometer that can support dual meat probes. You can pick one of these up for under $30. There is absolutely no excuse for an overdone roast.
🙋 Frequently Asked Questions
What is Bottom Round Roast?
The bottom round roast is a cut of beef from the rear leg of a cow. The butt of the cow, if you will, or beef bottom. Butchers know this cut as the outside muscle of the upper leg and from the round primal.
The round primal cut of the rear hind legs consists of eye round, top round roast, and bottom round cut. The video below explains the bottom round, outside round, rump, and hind legs.
What is a bottom round roast good for?
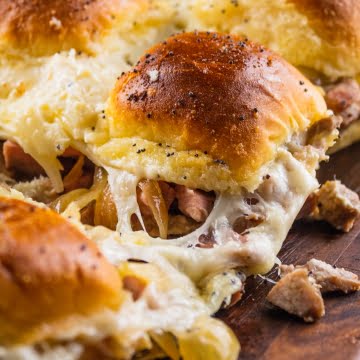
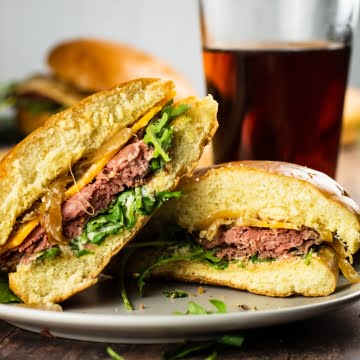
The bottom round roasts are great roasted in the oven and produce great leftover roast beef for sandwiches, tacos, nachos, and tasty beef jerky. This lean cut is affordable, and a popular option for pot roasts prepared in a slow cooker, crock pot, or dutch oven.
Should I reverse sear a roast?
Yes, reverse searing steaks and roasts thicker than 1.5-inches has several key benefits.
1. reduces overcooking
2. produces consistent results
3. less moisture is lost from start to finish
4. searing and browning is evenly distributed
5. rest, reverse sear, and serve
Is Bottom Round Roast Tough?
Yes, this is a tough cut of meat. Like the bottom round roast, lean cuts are naturally tough due to their low-fat content and low marbling. As a result, this is a budget-friendly roast with a low price tag. And when cooked properly can be juicy and tender.
🗃️ More Roasts to Try
Try one of these fantastic roast recipes for your next dinner meal.
🌟 Leftover Roast Beef Ideas
There is nothing better than delicious leftover roast beef. I'm undoubtedly guilty of gobbling it up the next day and love these recipes.
📋 Recipe
One Amazing "Bottom Round Roast" Recipe
Equipment
- Roasting Pan
- Large Cutting Board
- Carving knife or chef's knife
- Internal meat thermometer (see notes)
Ingredients
- 3-4 pounds bottom round roast - or outside round, rump roast, eye of round
- 2 teaspoons minced garlic
- 2 teaspoons dried basil
- 2 teaspoons dried thyme - or dried rosemary
- 1 teaspoon dried parsley
- 1 teaspoon Kosher salt - sea salt
- 1 teaspoon black pepper
- 2 tablespoons olive oil
Instructions
- Preheat the oven to 170 degrees Fahrenheit (77 degrees Celsius).
- Remove the fully thawed roast from the fridge and remove it from the packaging.
- Place the bottom round roast on a cutting board and let it rest for 10 - 30 minutes.
- Brush the entire surface of the roast with olive oil or your choice of oil.
- Combine all of the seasonings in a small bowl.
- Rub the seasonings over the entire surface of the roast - top, bottom and all sides.
- Insert meat probe into the thickest part of the roast.
- Place the roast in the center of a roasting pan with the fat side up.
- Cook for 2 hours per pound until you reach your desired internal temperature. When the internal temperature reaches around 125-130 degrees Fahrenheit (you've hit medium rare).
- Remove the roast, tent with foil and rest for at least 10 minutes and up to 2 hours before you reverse sear.
Reverse Sear
- About 20 minutes before your ready to eat, preheat your oven to 500-550 degrees Fahrenheit.
- When your oven reaches the above temperature, remove the foil and place your roast in the oven for 10-12 minutes. Or when your roast is crisp and golden brown.
- Remove from the oven, slice and serve it medium-rare. You do not need to let the roast rest when reverse searing.
Notes
- 120-125° F (49-52° C) - Rare
- 125-130° F (52-54° C) - Medium Rare
- 130-135° F (54-57° C) - Medium
- 135-140° F (57-60° C) - Medium Well
- 140° F+ (60° C+) - Well Done
- no additional resting, carve and serve
- meatier, beefier, and more succulent meat
- more consistent and easier to plan
Nutrition
The Perfect Bottom Round Roast recipe originally published Feb. 2018. Updated with new content in May. 2021. No change to recipe, I wouldn’t dare! This has been one of the all time most popular recipes since I first published it!
Andrea Martin
How long does the meat take to bake per lb?
Kim
I hate to give this kind of information because it seems like every oven is different. I really recommend checking the internal temperature regularly as it cooks. 2 hours per lb is a decent estimate but we've had roasts take longer and roasts take far less. It depends upon the thickness of the roast and your oven.
Beth
2 hrs per lb?
Is that a typo?
I'm thinking - after a seat, braise, like 10 min at 450 - 500° - turn off oven and leave door closed - time @ 10-12 minutes/lb
Remove, let rest 20 min and Slice your roast.
730 Sage Street
Thanks Beth, but this is not a typo, this is at 170, not the standard 375-450 which is 10-20 min/lb.
I am for 130-135 medium rare:
- remove from fridge and let rest 2-4 hours
- sear either in cast iron or oven (cast iron works better while oven is easier, dry roast/dry pan)
- fat side up and slow cook at 170, sometimes less if I have extra time
- tent for 10-15 before carving, slice the meat against the grain
Note that a fat roast may even take 2.5 hours per lb!
“Roasting slowly is where all the good stuff happens,” says Jim Swenson, who has been executive chef at the National Press Club in Washington for 17 years. He also recommends 2 - 2.5 hours per lb at 170.
Trying to guess the internal temperature of a roast is not recommended. With the variations of ovens today: gas, electric, convection, and hybrid it is not good to follow a recipe blindly. Check your roast with a meat thermometer (!!)
Tiger
about to attempt this, I have a small 2lb roast, that's cut thing, about 3 1/2 in, I'm thinking that this will take significantly less time than 2hrs a pund. Maybe 1 and ahalf, 1 hr per pound even? What do you think?
730 Sage Street
Wow, yes, definitely! And given you mentioned it is cut thin, you'll have way more surface, so it will cook faster. You'll have to rely on a meat thermometer for this one. And I recommend that regardless!
Selena
I thought you weren’t supposed to leave out after refrigeration? Did u mean to leave out 2-4 hours before striking in oven? Hope not cause I had mine out about 20 minutes and it’s now in the oven! Smells really good already 😊
730 Sage Street
I let the roast sit out around 10 minutes, so you've doubled what I'd normally do.
Pia Schaefer
Followed this recipe, OMG the best roast EVER!!!
I now have cooked this roast at least 10 times... Always comes out perfect
Thanks for this delicious recipe!!!
Vikki
I want to add carrots and small red potatoes when should I add? Cooking at 170
Kasey
Oh my goodness! This roast looks amazing! My husband had been looking up a lot of new, low carb recipes and we’re gonna add this to our rotation!
Kim
It's really good, and it's great because it's such an affordable cut of meat. You just have to take the time to cook it right.
Diana Drache
Do u cover your roast as it cooking in the oven?
Robin
Great recipe. Thanks for making it so easy to prepare this inexpensive cut of beef so well.
Meghan
Do you cover the pan while it’s in the oven?
730 Sage Street
No Meghan, you leave it uncovered so the roast gets that dark crust. This is part of the magic and you literally can not buy this kind of flavor.
Cathy
Do you bake it fat side up?
730 Sage Street
Hi Cathy, great question and the general rule is fat side up. As the roast cooks, the fat melts and runs down the sides of the meat. This helps provide flavor and moisture. Also another reason to avoid trimming the fat on a bottom roast.
Bonnie
Do you coverit
730 Sage Street
Hi Bonnie!
Uncovered = Roasting = Dark crust as pictured
Covered = Braising = No dark crust, considered a pot roast and common with veggies.
Both are great but have different textures and flavor.
Hope this helps 😉
John
Is it OK to cook this on a bed of aromatics ( Onions, celery)? Is it OK to add liquids to the bottom of the pan such as a small amount of water to help cook the vegies?
730 Sage Street
Sure it is OK John! This is more like braising and often referred to as pot-roasting. This is a great option for less tender cuts of beef and I personally love adding carrots, celery, red onion, and 1-2 bay leaves. Thinking about this now another great option would be fresh rosemary and thyme.
Estimate:
1/2 cup beef broth
carrots, celery, onion (naturally add liquid)
potatoes (not low carb)
1-2 bay leaves (or) rosemary and thyme
Notes:
Watch your cooking time, the steam from the broth and veggies will speed things up. I'd highly recommend using a meat thermometer!
Karyn
Turned out perfect. My guests raved about how tender it was. At first I was worried the garlic would burn...it didn't Next, I was nervous because after 3 hours in it was at 125 and I thought it would be done way to early (I had estimated 6 hours) but it took another 2.5hours to to reach 140. It was still light pink in middle. I will use this recipe again.
Torie
Dude. That was so delicious! We ate almost the whole 2.5 lb roast in one sitting and there are only two of us! Thanks for sharing!! We will be eating this again and again!
Mary
I agree! That was the most awesome roast I’ve ever made!!
Judy
I made this roast today. It is a fabulous recipe. I put the rub on yesterday and baked it today. I followed the cooking instructions to a tee. My grandchildren who are here with us loved it. I did chance cooking it tell medium/ well as they didn’t want it bloody! It was still juicy delicious!! Thank you for this recipe!
730 Sage Street
Appreciate the comment Judy! My parents use to make this for us as well and it was always a popular recipe.
Liz
I left a review yesterday (which I don't yet see), but feel the need to update.
My roast came out PERFECT. In yesterday's review I stated that after only 1 1/2 hours of cooking the roast had already reached 130 degrees. Since it had just 5 degrees to go, I assumed it would be ready way too early and would be tough. I then scrolled through some of these reviews and read that another person had the same experience, but it took an additional 3 hours for his roast to reach the desired temperature of 135 degrees! So I left it in the oven. It took another 2 1/2 hours to reach 135 degrees. That was two hours earlier than expected and way too early for dinner. I let the roast sit and 20 minutes before dinner I covered it with foil and put it in a preheated 350 degree oven for 20 minutes. It came out a perfect medium rare and was delicious.!
I am still wondering why it didn't take the full 6 hours to cook. The roast was 2.9 lbs, so I let it sear for just 15 minutes, and including the searing time, it took just 4 hours to cook. It was tender enough, but I think that if it had taken a few hours longer to reach 135 degrees it would have been even more tender. Any thoughts on this?
Bottom line, my family loved it and I will definitely be making it again.
730 Sage Street
Things have been hectic here lately, so we are a bit behind.
The biggest issue I've seen, from personal experience, is oven variation. We have gas, electric, and convection ovens, and each of these will have a varied outcome. Add to that the fact most oven temps are inaccurate, leaving us with some pretty significant variations in cooking time.
Know Your Oven
For instance, I'll often cook at my mom's house, and after my first overdone roast, I had to make adjustments. Knowing your oven plays a big role in baking, roasting, etc.
And to answer your question, yes, I've cooked roasts overnight that are super tender. When you try again, you could lower your oven temp by 10 degrees and compare.
If you'd like to share specifics, feel free to email me at hello@730sagestreet.com.
And thanks for the comment and detail Liz, I appreciate it.
730 Sage Street
It is worth mentioning for everyone scanning/reading the comments.
Every oven cooks a bit differently, and you must adjust accordingly.
To achieve the perfect roast, you must make adjustments for your oven and for the weight of the roast. Rather than following a recipe exactly, use it as a guide.
When preparing a roast recipe for the first time, monitor it closely. Use a meat thermometer and even consider using an oven thermometer to verify your oven temps.
Gas, Electric, and Convection all vary. While gas and electric have similar cooking times, convection cooking times are often reduced by 25% or more.
Knowing your oven is the key!
David Miles
My Wife made this for us using an inexpensive bottom round roast and I want you to know it was the Best roast beef I have ever tasted. .
Thank You
730 Sage Street
Appreciate it David, thanks for leaving a comment!
Dave P
all I can say is WOW! I made this yesterday and it was amazing. I'm glad I read through the whole article and followed the tip to check at 1/2 point. My 4 pound roast was perfect after 3 hours this is definitely a keeper. thanks
Liz
Thanks for the response. The roast was so delicious that I am making it again for dinner tonight. I am looking forward to trying some additional 730saagestreet recipes
Madeline
My family isn't big on pot roasts done in the crockpot and instant pot, plus I wanted firmer beef for sandwiches. Your dry rub oven roasting method worked very well for me! Today I'm doing out and buying a larger roast, plus an oven thermometer. I look forward to trying your other recipes.
730 Sage Street
Stellar Madeline, your comment really made my day and I agree, this recipe is perfect for roast beef sandwiches.
Melissa P
Hands down the best roast I have ever made! Thank you so much for your detailed instructions and comments. The simple rub was perfect and cooking fat side up resulted in a beautiful, flavorful cut off meat. Low and slow is the way to go! Paired with sauteed herbed new potatoes and fresh green bean casserole. My family loved it and we all had seconds!
Donna Moore
I have a 16 lb bottom round that I want to roast and then chip for roast beef sandwiches . Its a whole piece. Your instructions on cooking time sounds really long to me. Serving a small army of hungry people. What is your recommendation as far as cooking time for that size?
730 Sage Street
Wow, our bottom roasts rarely exceeds 4-5 lbs. Given this is three times the normal, I can't confidently answer this. However, if using the low and slow method, it is going to take time for the heat to transfer through the 15 lb roast and reach the center. If I was doing this personally, I'd give the roast a good sear and roast in 4 hour increments between 150-170 degrees F and monitor internal temp. with a meat thermometer.
When you reach about 125° F (52° C), this is generally the midway mark. And from here you can estimate remaining time depending on your desired final temperature.
730 Sage Street
If cooked low and slow yes this is a good approximate. It would depend on our final desired temperature ranging from 135° F (57° C) medium rare - 160° F (71° C) well done. About halfway through, you should reach about 125 degrees F, which will give you a better idea of your exact cooking time.
Jan
Great flavor! We truly enjoyed the enticing aroma as it cooked., too. The information included in the recipe was extremely helpful. My roast cooked more quickly than expected, but checking with a thermometer saved the meal. I will definitely repeat this meal. Thank you- well written.
Dusty
Was really good 3 lbs needed only 90 mins after the 20 mins at 450, very good did in a cast iron pan and made gravy from pan juices. Must rest at least 20 mins.
Kathleen maddox
I am excited to try this and Glad you mentioned elevation..I am in Denver CO Burb ,at like 5300 always at a loss where to check meat time living here .I really want this to come out and not be a,waste !
730 Sage Street
Sorry for the late reply but really appreciate the comment on elevation. Did you end up making this roast recipe?
Leslee
I had a 2 1/4 pound grass fed bottom round roast in my freezer. I was very skeptical about this recipe and the length of time suggested but I thought I would give it a whirl anyway. I seared it at 450 degrees for 15 minutes because it was a smaller cut. I lowered the temperature to 170 degrees. Based on this recipe it should take approximately 4 hours to cook. My plan was to take it out at 135 degrees for a medium roast. I checked it at 1.5 hours and to my horror it was at 160 degrees. Far too overdone. I made a wonderful gravy with the drippings and served it slathered in the gravy on top of a cauliflower and parsnip puree. It tasted great but would have preferred a much less done roast.
730 Sage Street
Thanks for your reply Leslee, really appreciate the time and feedback!
A few things caught my attention. Going into a recipe already skeptical is probably not the best mindset, resulting in a few hiccups for a very small roast. You'd truly need either a lot of experience to pull this off or heavily modify the original recipe.
Sear time of 15 min for a 2lb roast is high (15 min at 450) and smaller roasts are often thin vs fat. At this point I'd estimate it was already 1/4 cooked.
The default temperature is 170, so this was not truly lowered. Frankly anything under 3 lbs, I'd recommend 150 as I did once earlier.
You definitely had the right plan, just did not account for the above. All in all you pulled it off and thankfully you had a meat thermometer and checked it as recommended. Which ultimately saved your day!
Off topic, I would not be surprised if your oven runs on the hot side.
JIA
Trying out this recipe tonight! Had bottom chuck in my freezer, took it out this morning to thaw and defrost. Found this recipe around 2:30 and prepped the meat and put it in the oven around 3:10. If I’m running a little low on time can Increase the oven temperature? Or would that make the meat too tough and dry? The roast is 3.5lbs, I’m hoping it reaches medium, I have a gas range oven. I’m hoping it could be done by 7:30 Any tips on what I should do? Thanks!
730 Sage Street
Hi JIA,
So lets say you put this in at 3 for simplicity! Also for the gas range I'm wondering if your using a dial or have an exact temp set? Most gas ranges at dial 2 are around 150 °C which is 300 °F, far to hot for long and slow. I'm hoping you were able to cook this around 170 °F for the recommended time.
Also, it is always a good idea to check a roast at the midway point. From here you can adjust as needed.
3-4 lb fat bottom roast would take longer than a thin roast (shorter and fatter)
3-4 lb thin bottom roast would take less time than a fat roast (longer and thinner)
Check at the midway point and call it like you see it. This is based a lot on your oven, the specific roast, and the doneness.
Hope this helps!
Samantha
This looks delicious. I have a 3.4lb roast and I did 450 for 10 minutes then down to 170 for the remainder. I put a meat thermometer in and it reached 135 degrees 45 minutes later. I'm curious if there is something I did wrong? I did pull it out and I'm letting it rest now! Also my oven doesn't go any lower than 170...thanks for any tips!
730 Sage Street
My best guess, this was a thinner roast. Yet, with others are reporting 3+ hours for smaller roasts I suspect something is off. If I have extra time I'll go as low as 150 myself for the perfect low and slow roast.
Judith
So happy that I found your recipe. I bought a bottom round roast at the market because it was on sale - $2.99/lb. Then got home and wondered how I was going to cook it. Came across your recipe and thought it looked easy enough. My roast was just under 3 lbs so I seared it for 10 mins at 450. I then lowered temp to 170 and set a 3 hour timer so I could check the temp. When I did it was already at 140. I debated about what to and decided I would take the roast out and let it rest. So glad I did as it was cooked perfectly! So instead of dinner being on the later side, it ended up being on the earlier side which was fine because what else is there to do during this pandemic but eat!
I will definitely using your recipe again - thank you so much!
Allison
Thank you so much for the recommendation! I was having a hard time finding a recipe for my 2.7 lb roast but came across your comment and it came out at a temp of 147!! It's perfect 🙂
Mary
Thnx so much!! My roast is 2.25 lbs & curious how much time you cooked yours- looking for Med Rare💕. Thnx!
Roseann
This turned out perfect. I changed nothing. It was so tender I have never been able to cook a bottom round roast this tender I will cook this again and share this recipe.
Jen
Absolutely incredible! So tender! I may never bother with a more expensive cut of beef or will use some variation of this recipe if I do. I had a 3.24 pounder. I let it sit on the counter for about 40 mins with the olive oil and dry rub. I ran out of oregano, so I used Italian seasoning instead. I also chose to sear the meat in the cast iron on the edges only on the stove, while the oven was heating. I figured it’s going to be going in the oven fat side up, so there was no reason to sear the bottom or the fat side, as it would do that during cooking. Right before putting it into the oven for the 20 mins, at 450, I put some left over dry run and olive oil on the fat side. Also, I was running a little short on time so I upped the temp to 200 deg, from the 170, for the last hour or two and it was still a succulent roast. Thank you so much for sharing this recipe. Best Roast Beast Ever!
Sarah
My question is regarding using a roaster. Would the time frame and heating be similar or would it vary? We have a 5lb roast so guesstimating 10 hrs. Thank you.
730 Sage Street
It really depends on your roast. A thicker fatter roast will take longer than a thinner longer roast at the same weight. Just be mindful of this and go slow, on low temps (150-170F), and monitor.
Lynn
It’s an interesting question. When we use the oven we get it up to required heat before putting the roast in..
730 Sage Street
Sorry for the late reply, and yes absolutely. This is exactly what pre-heat means. If you put the roast in while pre-heating or before it reaches the desire temp, you'll certainly have an overdone roast.
Roxanne
Superb!
4 lb outside round.
Just over 3 hrs. to 145 degrees 👌🏼.
Moist, tender and delicious!
Thank you!
POOKIE
so happy to find you...i am planning to purchase a 'bottom round' & want to know if i can make it in the oven on a rack.
should i sear it at the 'hi' temp you recommended first? ia have only made chuck roast before..(many).
thank you so much.
730 Sage Street
For most roasts above 4 lb, I use a roasting pan with a vrack. It is nice to elevate the roast so it gets proper airflow, browns evenly, and allows you to make a nice gravy.
Katie
Just wondering if you cover the roast or just put in the pan no cover
730 Sage Street
Do not cover, do not add liquid. If you cover you'll end up with a steamed roast (cry). We want to brown and crisp the roast to increase the flavor profile. I also love using a vrack with 4 lb or larger roasts as it helps elevate the roast, increase airflow, and keeps the roast stable. Lastly, when possible place the fast side up as the juice runs down the roast, basting it while it cooks.
And don't forget, low and slow at 150°F - 170°F, not Celsius.
Amy Taylor
This is a great technique for cooking a challenging cut of beef. I highly recommend dry-brining your roast for 18-24 hours before proceeding with this recipe. Take your roast out of the packaging, pat it dry, and then coat liberally on all surfaces with salt (I use Diamond Crystal Kosher). Wrap it tightly in plastic wrap. place it on a plate, and put it in the fridge. Remove it just before you're ready to cook it. Proceed with the recipe as given. You'll find the end product to be much more flavorful. I only buy grass-fed beef, and if you do you need to remember that grass-fed beef usually cooks faster and is more lean so the extra boost from the dry brine makes a big difference. If your grass-fed roast is smaller than 3.5 pounds, you should definitely lower the oven temp. from 170 to 150 for the second phase of cooking. Watch and monitor the temp. closely and try to get it out of the oven at 130 degrees. Slice as thin as you possibly can. I love the leftovers in a sandwich with some grainy mustard and a slice of cheddar cheese.
730 Sage Street
Awesome Amy, thankful to hear you cook your roasts low and slow. And grassfed beef and dry brine sounds great. Just as you mentioned, I would also aim for 150 for smaller roasts and have mentioned this multiple times. Thanks!
LD Curtis
Oh my goodness! I seldom leave comments but I am pretty excited about this one. I usually stray from just about every recipe, but I didn’t from this one because my bottom round roast was 3-4 pounds. It was perfect! Thank you for sharing!
Dee112
I followed your instructions. I have never heard such moaning over a meal! This is a keeper recipe.
Would your instructions work for brisket?
730 Sage Street
Yes, absolutely!
A 72 hour brisket cooked at 140 is very common. The principle is exactly the same, low and slow.
Justin
I think you took 'letting meat come to room temp' too literally! And missed the point!
It's not about the center coming completely to room temp. Especially on a larger roast. But more importantly for a thick steak being cooked medium rare. If straight from fridge to pan, the outside will be cooked while the inside is still rare. Same for many proteins...to get an even cook, it is important to let rest at room temp first. And that's what Wolfgang most likely meant.
730 Sage Street
This 10 min is helpful as a cold roast will sweat and release moisture at room temperature. Thus I find it is more important that you dry the meat before searing, ensure your pan is hot, and the roast has adequate space in the pan. Anything larger than a 4lb roast, and I use my vrack roasting pan. Otherwise, this will provide a nice sear and a beautifully browned roast.
Angela
I want to thank you for this recipe. I had never used this cut of beef before and was always using the same recipe handed down from my family for pot roast. So this recipe was a game changer for me! I followed it exactly as stated and it is delicious.!
730 Sage Street
Thanks Angela, I'm happy you enjoy the roast beef and really appreciate the feedback!
Amy K
I had a somewhat smaller roast so it didn't take as long. I used rosemary and thyme as that is what I had. And place it on large slices of onion in the pan. Turned out wonderful though.
Allan
I just tried this and WoW !!!
I followed the recipe exactly except I had a 1.8lb bottom round, so I did 12min @ 450. Then it was an hour and a quarter @ 170F till it hit 135F on my temp probe. Pulled it, let it rest ten minutes and am just stunned at how tender, juicy and delicious it is 🙂
I highly recommend.
Allan
Angela Berry
I followed the recipe as it’s written… just took it out of the oven; my meat thermometer reads a perfect 135!! Looks and smells delicious!
My roast was a little over 3 pounds … cooked it for exactly 2 hours per pound (6 hours). It’s resting now… I’m so excited… it’s perfect!
Kimberly Grabinski
Amazing Angela, I'm so glad, it sounds like a picture perfect roast. Enjoy your Sunday dinner and thanks again!
Ashley
I have a 5lb roast. Am super nervous about cooking it for 10 hours.
Kimberly Grabinski
No one said you have to cook it for 10 hours! You cook the roast until the meat probe reaches your desired temperature.
If I can BBQ brisket, chuck, or roasts low and slow for 24 hours. You can easily cook a 5 pound roast for 10 hours at 170 degrees Fahrenheit.
Fahrenheit
Low and Slow
150 @ 2.5 hours per pound for under 3 pounds
170 @ 2 hours per pound for 3 pounds plus
tender, soft, pink throughout
High Heat
350 @ 20-30 min per pound
shoe, overcooked
See the difference?
At 170 it takes a long time for the internal temperature of a 5 pound roast to reach 125-130°F for Medium Rare, plus reverse sear.
Hope this helps!
Peter
So far, so good, but please note regarding timing:
I just pulled my 3.53 lb BRR out of the electric oven after 3 hours 15 minutes, not the ~7 hours that was suggested in the post. My BRR came out of the fridge at 38 F, went straight into the oven (preheated to 170 F), and when it reached an internal temp of 127 F. out it came. FWIW I used a brand new wired thermometer (which I tested earlier with ice water and with boiling water; it was spot on for both readings), and I also checked the oven temperature as well, the 170 F setting gave an actual temperature of 169 F, so it wasn't the oven overheating.
Anyway I am now waiting for the other dishes to catch up, and then I will do the sear. We will be having our Thanksgiving roast beast a bit earlier in the day than originally intended, this is not a problem, but in another situation it could have been inconvenient.
Kimberly Grabinski
Spot on Peter, so glad to hear! You've outlined what I'm consistently repeating. To cook meat in the oven, you need a meat thermometer! Lighter roasts under 4 pounds, and thinner/longer roasts will always cook faster.
I'm cooking a turkey today, using the same cooking method but at 200 degrees as I'm cooking white meat. But thankfully, with Turkey, they are pretty consistent in shape and size and thus time per pound. Roasts, however, vary a lot between length, width, and thickness!
Beck & Bulow
Best part of it is if there are any leftovers, I cut up the meat and the potatoes into bite-sized pieces, add the leftover green beans, add some beef broth or wine, and it makes an excellent soup.
Jim
Mmmmmmm! Excellent recipe for bottom round. Low and slow is the key along with a thermometer for tenderness. Delicious flavor from simple ingredients.
Betty R Bulfin
Can the roast be slow cooked the day before and seered the next day before we serve it?
730 Sage Street
No Betty, this is not recommended as the reverse sear is only for 10 minutes at high-heat and wouldn't be enough to rewarm the roast. If you have no other choice, you could try reverse sear, carve the roast, then place it back into the oven at low-temp until you reach a nice serving temperature.
Evelyn
Can I sprinkle onion soup mix on top of my beef roast? Does it make the roast tender
730 Sage Street
I'm sure you could season your roast this way. However, I can't see how it would make any roast more tender. Seasoning adds flavor, while the quality of meat and the cooking method contribute to the meats tenderness.
Tony Scalpelli
I see that the roast in your pictures is tied with string. Why is it tied? Did you tie it or buy it that way. I don’t see you mention tying in the recipe. The one I bought is not tied and I wouldn’t normally think to tie this cut of beef. Looking forward to trying this recipe. Thanks.
730 Sage Street
You can buy it with, or tie it yourself with kitchen twine or butchers twine. While it is not necessary, I find it gives my roast a uniform shape and ensures it cooks evenly.
Barbara
This is the best recipe EVER. I’ve always end up doing a crockpot roast. My family of 9 gave this recipe an excellent rating. It was so delicious !!!
rich
Hi. I see conflicting information about internal temps. In a lot of recipes, the internal temp for medium is 145F. This recipe says 130-135F. I'm confused. Could you comment? Thanks-
730 Sage Street
For this cut of beef, I prefer to reverse sear. I take the bottom round roast out between 125-130 and let it rest, in your case 130-135 for medium.
About 20 min before serving I'll preheat my oven to max, around 500-550, remove the foil and pop the roast in the oven for 10-12 minutes (without the meat probe, not needed at this point). Once the roast is perfectly browned and has a nice crispy bark I'll take it out of the oven.
At this point, I have a perfectly cooked medium-rare roast that is ready to serve (no additional resting). And yours will be in the 140-145 range if you took it out at 130-135 as mentioned.
Cathy
Wow!! This method turned my 4lb cheapie bottom round roast into a delicacy!! So glad to find this before cooking it for my family- got rave reviews!! The only thing I did different was left it on counter 4 hrs to get completely room temp. This shortened the expected cooking time by a couple hours. Thank you so much!
Paul
I tried this recipe, it comes out exactly as described!! My only choice next time will be to change to a different seasoning!
Kimberly Grabinski
Thanks Paul, glad to hear you've mastered this recipe! And absolutely, when you factor in brines, dry rubs, marinades and seasonings, you can make a bottom round roast that works for you.
Ann
I’ve tried many roast recipes for a bottom round roast & they all came out dry as a bone & tasteless.
Well, let me just say that this is the best roast recipe ever!!!! I followed the recipe to a T & it turned out medium rare, moist & absolutely delicious!
Pam
Great recipe. I have never tried to cook a bottoms round roast before. Afraid it would turn out tough and dry. Also never tried low and slow. Well this recipe was great. Roast came out moist, delicious. I was amazed and especially proud because I got out of my comfort zone by cooking low and slow. Sure glad I tried it and will definitely do this gain.
Martha Mercuri
The roast had a wonderful flavor. I had to cook a little longer to get it to an internal temperature of 135 to make sure it was safe to eat. It looked great and turned out very tender. I put the rub on about 4 hours before I put it in the oven and the flavor really settled in.
GM
Any benefit to “searing” in the oven at 500-550 versus searing on a cast skillet on the stove top?
Kimberly Grabinski
Both work, however the benefits are:
- no mess, no oil, no additional cleanup
- even consistent heat distribution (500-550F)
- no monitoring or flipping required
- less likely to overcook
Jason
I'm going to try this recipe out. I notice in the "Cooking Tips" section of this article you mention... "You can try make gravy. However, I find bottom round roasts lack the fat content necessary to attempt gravy. Instead I save the left over beef broth in a container." I'm not seeing beef broth in the actual recipe. Maybe I'm missing something. But, should broth be added to the roasting pan or no?
Kimberly Grabinski
Do not add broth to the roasting pan, you'll steam your roast!
As I said, it will be difficult to make gravy. You need FAT to make gravy and round cuts like the bottom round roast are lean. Save the small amount of juice and use it in another recipe. The flavor is perfect for enhancing stews, etc.
Kelly
Large family, my roast is 9 lbs.
do I really need 18 hours?
730 Sage Street
Kelly, it'll really depend on the shape of your roast. I've had some thicker bottom rounds and thin bottom rounds. Trust your meat thermometer, even if it comes out early, tent the roast until your ready to sear and serve.
Christina
Can you add vegetables to the roast while cooking; potatoes, carrots, onions, celery?
730 Sage Street
Yes, if you have a rack to elevate the roast. You'll want adequate airflow around your bottom round roast for even cooking.
Paula Augustyn
We loved your recipe, thank you! I've never been great at cooking any roast and most always used a crock pot. I followed your recipe exactly cooking with the olive oil and seasonings and baked in the over at 170 degrees. It was perfect and everyone loved the roast.
Rick M
In all my years of farming I have never heard of feeding grass to butter (grass fed butter) 😉
Loved your horseradish sauce.
Tonight I overcooked this roast because of an hour and a half business phone call. We Ike rare/Med rare; it was done and edible. Key is keep the temp low! Lots of ways to do it, you have a good one!
I do a dry rub if I need to get it in the oven, your spice selections are really good. Rub them in and get it in!
Lisa
Looking to try your recipe soon! I'm excited! However I don't have a roasting pan/wrack to roast it in. How would I cook it if all I had was a cast iron Dutch oven? Or would you recommend just a stainless pan? Would either of those work fine? Would the bottom cool to fast?
Laurie
Can this be adjusted for slow cooker?
730 Sage Street
No, Laurie, our bottom round roast is meant to have a nice brown bark on the outside (flavor), cooked to medium-rare throughout. If you'd like to go the slow cooker route I highly recommend my crockpot pot roast recipe as an alternative to this recipe.
M.
Extraordinarily detailed notes make this simply one of the best recipes online! I'll share for others who prefer rare beef (eg. I order steaks "black and blue" and love tartar!) for this particular cut, I'd recommend going more "done" than you'd usually: I cooked to the advised internal temp for borderline rare/med-rare (52C/125.4F), which was very good but still quite raw-chewy (it's a tough cut)... so next time I intend to head a little deeper into med-rare temperature for further tenderization. Cooking to rare would have made for a wayyyy too chewy dinner IMHO.
Kimberly Grabinski
In my experience, cooking a bottom round roast well over a hundred times, medium-rare is the sweet spot for lean cuts of meat. I wouldn't recommend going past 130 degrees Fahrenheit before pulling the roast. Large roasts also radiate heat for about 10 minutes after being removed from the oven, adding about 5-10 degrees, known as carryover cooking.
The secret to cooking lean cuts
The weight of the roast is important. A 2 lb bottom round roast will take half the time as a 4 lb bottom round roast cooked to the same internal temperature. Unlike high-heat cooking, the added time cooking a larger roast produces a far more tender result. Whenever possible, opt for larger lean cuts, plus leftover roast beef is fantastic.
Low-heat cooking is the only way to cook a tender bottom round roast or any lean cut of meat. Anyone that recommends cooking a lean roast at 350 degrees has lost their marbles.
The longer you can cook a roast at a low temperature, the better the final result. And with a meat thermometer, this is super easy.
Carmen
I prepared this recipe exactly as written. It was wonderful! Next time I’ll season the meat and let it sit for a while for even more flavor. I served it with a drizzle of brown mushroom gravy.
Fabulous flavor and texture!
Thank you very much.
Jackie
Absolutely fantastic!!! Normally I sear my roast first and cook at 350. This is the first time I've cooked a 4lb round roast I bought for $20 on sale at 200F and reverse seared it for 10 minutes. Definitely an improvement, roast was tender considering the cut, and entire family loved it. Can't wait to try it again!
Brazil, G.
June 19, 2022, used this receipe to cook a 1lb,10oz Bottom Round Roast, that I brought on sale for $5.49, it's enough meat to feed 4-6 people.
I cooked it at 170 degrees
the lowest my oven would go, for approximately 2hr,45min.
The temperature was 130 degrees, when I removed it, it came out medium rare. The seasoning was good, next time I will use more.
Nancy*
I cooked a 2.5 lb roast at 175 because that is as low as my oven would go. I removed it at 124 degrees because we like rare/medium rare. I don't remember how long it took to cook--probably less than 3 hours. However, despite being a beautiful red, it was still tougher than expected. The seasoning was great though. I would recommend saving smaller roasts for a crock pot or something that can cook low and slow. I'd be willing to try it again if we had a larger roast.
Kimberly Grabinski
Absolutely! A quality 4 lb beef bottom round roast takes considerably longer to cook than a 2 lb roast. The additional cooking time allows the connective tissue and muscle fibers to break down, resulting in a tender and affordable roast. I actually have a crock pot roast beef that could easily accommodate a smaller roast.
There are so many recipes that recommend cooking a bottom round roast at 350 degrees and blasting it with high heat. Thanks for giving this a try and appreciate your comment Nancy.
Samantha
I've tried this recipe once, second time tonight. It came out great the first time, but it has been a while. I forgot what I did the first time. Should I flip the roast, fat cap down, when reverse searing, or leave it up? I just want to make this the best possible. Thanks for a great recipe and for hopeful advice.
Kimberly Grabinski
If you happen to have a bottom round roast with fat cap, cooking fat side up has always been standard practice. As the fat renders it will baste the roast rather than merely dripping into the pan.
Kay
I’m excited to try this recipe but I have two roasts, both roughly 2-2.5 pounds. How would you recommend cooking them both at the same time?
Kimberly Grabinski
Yes, you can definitely cook both roasts at the same time! Just make sure you leave adequate space between the roasts for proper air circulation. I've done this numerous times when I want to eat one roast for dinner and save another for leftovers. Two roasts will take the same amount of time as one roast of the same size (as long as they're spaced apart enough).
Brent Foster
Hi Kimberly. My questions have to do with pre seasoning. I am going to season and refrigerate for approx. 40 hours before cooking. Should I season with just salt or all of the herbs, and should the roast be wrapped in cellophane?
Thanks.
Emily
This was delicious! One issue that is no fault of the recipe is the reverse sear smokes out my condo with alarms blaring. Have you ever skipped that part or have any tips?
Kimberly Grabinski
I totally understand Emily, I've cooked a few roasts in apartments before and know what you mean. You have three options, cook as is, open and quickly pull the roast allowing a minimal amount of smoke to escape (let it dissipate in the oven). Pull the temperature back by 100 degrees, also pulling roast quickly. And lastly, a reverse sear in cast iron pan on the stove is another option, which gives you more control and less smoke. Hopefully one of these work for you next time around!
Stephanie
Hi Kimberly! I’m in the process of cooking my bottom round roast per your instructions and need to know how long to reverse sear using my cast iron skillet? And do I remove the fat before searing in the skillet? Thank you!!
Kimberly Grabinski
In a nice hot cast iron, 60 seconds per side is likely enough. However, it really depends on personal preference! I never remove the fat before searing and I sear if first to add some extra fat to the pan.
Sharon
Put a 3.28 lb bottom Roast in 170 degree oven at 11:30, would like to eat by 5:00. What can I do to speed up the cooking tobeat by 5:00 est.
Kimberly Grabinski
Hi Sharon, with a roast under 4lbs I'd check it at the midway point. There are other factors at play like shape of the bottom round roast (thick vs thin roast), and of course your desired final internal temperature. To start I wouldn't adjust anything and adjust at the midway point, if needed.
Amber
Can you elaborate on what you would adjust at the midway point to speed up? Thank you.
Kimberly Grabinski
Assuming this is a 3-4 lb bottom round roast, you can increase the temperature by 25-50 degrees. It is hard to say specifically without knowing more detail.
A trick I've used a few times! Monitor the meats temperature and if you have to pull it early that's fine, let it rest, sear it, and slice to your preferred thickness. THEN layer it in a cast iron pan or baking sheet and cook it until it reaches your desired doneness. This is also great with a nice gravy but depends on the dish itself.
Donna
Made it today and although it is time consuming, it was very tasty and tender. Will definitely save this recipe!
Fran Davis
I love this recipe. And I learned a lot by reading your tips. You explain this recipe so well. Thank you I had never tried a slow roast in my life and now I will always use this roasting method.
Thank you for your site! Fran
Trevor Siemiatkowski
I’m in the middle of preparing my beautiful hunk of 4-5 pound eye of round to go in the oven. It’s already coming together amazingly, I can only imagine how great it’s going to taste. Great recipe and Great information on cooking times and temperatures! Very informative to home cooks and chefs everywhere!
ONE TIP TO ANY FOOD LOVERS!
- Always check your meat every 20-30 minutes if you really love cooking and the amazing products we all get to use, doing this will allow you to make minor adjustments to your roast (Baste with a little bit of butter, add a little extra seasoning, turn up or down to the temp), that will majorly effect your amazing end product!
Angela
Do you not add any liquid in the bottom of your roasting pan?
Kimberly Grabinski
Zero liquid Angela, as outlined in the recipe you should elevate the bottom round roast to allow airflow and even cooking. In this recipe, we are aiming for a nice bark or crust on the roast that is loaded with the ultimate flavor.
Jon-Jon
Roasted a 7.8 pound roast @ 170*F, took 8 hrs and came out perfect!
Could not ask for anything more.
Terre
I scored some bottom round roast for $2.50 per pound. We ground most but saved a couple of roasts. The first one I made was not great so I found and tried this recipe. It turned out amazing! My best roast ever! Try this! You won't regret it.
Rebecca
I made this for Christmas dinner. It was just perfect! I was nervous because I typically do a prime rib roast, but they were out of them. This was so good prepared as written. The reverse sear really made it! Thank you!
Edna B.
This recipe sounds good and I'm trying it for the first time now. My question is my roast is 2.38 pounds but in the recipe, it states that if it's under 3lbs, to have the oven temperature set at 150°,my oven only goes down to 170°. How long do you think i should cook it for?
Thanks in Advance!
Rebecca Yates
Made this tonight, and it was absolutely delicious. Restaurant quality. I followed the recipe to the letter, and my 3.75 lb roast cooked to 125 in 3 hours and 45 minutes. I let it rest for 1 hour and then reverse seared. I will never cook roast any other way!
G
Two hours per pound is far too long for this cut. Also, leaving a thermometer probe in while cooking results in an incorrect reading as most use a metal probe and the heat convects down the probe and will read higher (mine beeped only 90 minutes in and the roast was still mostly raw), so checking the temp occasionally is better.
Tara B.
I’m 59 years (young) and this was the BESTest Bottom Round Roast I have ever made! Thanks to this (simple) recipe. ⭐️⭐️⭐️⭐️⭐️
Bob
Help! My roast is cooking way faster than stated and it's way too early for dinner.... Its a 4 lb bottom roast and my oven won't go any lower. 2.5 hrs in and it's close to pull temp (115°) Should I turn the oven off for now? It's 4 hrs before dinner....
Dagny
Same problem, Bob! 3.5 hours for a 4.4 lb. roast and it's almost done. 5 hours to dinner! Don't try this recipe for the first time on an important day! Got to figure out your oven first.
Rick McDermott
Planning this for tonight…..can I use a cast iron skillet for the roast instead of a roasting pan?
Laura M.
I usually crock pot all my roasts. Made this today and if I could give it more than a 5 star review I would. Will definitely make this again, highly recommend this recipe.
majelling
Is outside round roast the same as bottom round roast?
Denise Ventimiglia
I made a 2.13 beef round roast and I put a nice crust on it, but what temperature do I put on the oven?? My oven doesn't go down to 120° I put my roast in on 215 for a hour and a half, is that the right temperature??
Sherman
Great recipe! Followed it to a tee. Thanks for the inspiration!
Yum
Don Korstanje
Is it supposed to be covered at any time?
Nancy D.
Great flavor! The whole family loved it!
Kathie O'Donnell
I have now tried this recipe with a bottom round and eye of round roasts. The second time I just used salt and pepper and onion powder along with garlic inserted into slits into the meat. It was so good. Definitely check the meat temp before it is expected to be done. My meat was 4 pounds which meant 8 hours to roast. Luckily I pulled it out around 5-6 hours. The temp was 135-140. Did the sear and sampled the meat - amazingly tender. Slow and low is THE way to go.
Lyra G Veal
My husband and I tried this today... It is very good but we neglected to lower the temp with a 2.5 pound roast so it is more medium than medium rare! NEXT time, we will follow to a "T"!
Angela
This really works. I have never cooked a decent roast, including really great cuts. I will only follow this recipe now. The roast was excellent!!
Paula Jones
This bottom round roast was very tasty and very easy to prepare! I will make this recipe again!
Dannie
This is my go-to recipe for the smaller bottom roasts I get from Butcher Box. Always make delicious sandwiches from the leftovers.
James
I made this recipe tonight. It was absolutely fabulous. I made a. Oriole of changes. Instead of using the spices listed, I used one package of beef stew seasoning and two cups of water. I added potatoes and carrots as well, kinda like a pot roast. I cooked it at 170 degrees until the last 40 minutes and then I turned it up to 400 degrees and cooked it for 40 minutes. This made a nice crispy texture on the outside of the roast. Very delicious!!
Rachel
I appreciate the exceptionally well written recipe. It worked well, and it's so great to have all the reference notes for temperatures and adjustments readily available in the recipe. Thank you!
Donna Jean McCoart
I fixed this for dinner last night using around a 2-1/2 pound bottom round roast. I followed the recipe and it came out perfectly medium rare and was so delicious. I got the roast on sale and decided to get two of them one for last night and one for the freezer. In fact I've decided this is what I'm fixing for Thanksgiving. I'm looking forward to making sandwiches with what is left of the roast. Thanks for sharing the recipe!
Mel
I NEVER leave comments on recipes but this deserves recognition! I followed the recipe and it turned out amazing - I still can't believe I cooked something this good!
I get a little freaked out turning the oven up high, so I only did 470 degrees for the reverse sear. The fat started smoking and my detectors went off when I opened the oven door so I stopped at 8mins. No need to burn the house down for a roast. 🙂
Meg
Perfect recipe and so easy to follow! First time low and slow bottom roast for me and it was a huge hit! I had the time to season it up and let sit in the fridge overnight uncovered on a rack. I will never skip this step ever again. Beautiful crust and super juicy roast! Thank you so much for the detailed and educational recipe!!!
Ann
Love this recipe! Easy and delicious. I recommend using a meat thermometer. I had a 3.11 lb roast 2 hours per lb was way to long I paid attention to my meat thermometer and it turned out perfect! My question is “Can you freeze left overs?”
Dagny
I just made this today with a 4.4 lb. roast. My oven won't go lower than 175. I set timer for 8 hours. After 3.5 hours at 175 my temperature probe beeped done (set for 125). Meat was 123 when double checked. Cooked way faster than I expected! Dinner isn't for 5 more hours! I'm going to tent it and just let it sit until dinner time, then sear it then. Hopefully it will heat up enough during searing.
Mary
How did that work out....letting it sit for that long before reverse searing? I have the same issue going on right now!
Karen
What do you do if the roast reaches internal temp of 130 degrees 5 hours before dinner?? Can it sit out before reverse searing for more than 2 hours? I have a 3.8lb bottom round roast, and at 170 degree oven, it's done way before expected. Help!
Marcia
I made a Bottom Round roast tonight using your low and slow method and it was totally amazing!! I usually use a high heat then reduce method and there is no comparison!!! Only method I will ever use from now on!!! Thank you so much!
James Hall
I'm a medium rare person, my wife though is slow cooker roast, falling apart. She was away, so I bought a round roast, following your method, it turned out absolutely perfect. Just as you said it would! Thank you so much! Jimmy.
Fran
I very rarely leave reviews, but I couldn’t believe how delicious this roast was. My husband and granddaughter loved it.
Te McLaughlin
Yummy - definitely worth preparing this way again!